Blog

  • Renovation Tasks You Should Not DIY (Save Your Equity!)

    Renovation Tasks You Should Not DIY (Save Your Equity!)

    Staring at a sledgehammer after watching weekend home improvement shows makes tackling big renovation tasks you should not DIY look deceptively simple. Our remodeling crew has spent years correcting well-meaning homeowner blunders, and we know how quickly a simple project spiraling out of control can ruin your home value. 

    While swapping cabinet knobs or painting a bedroom builds confidence, crossing into heavy structural, high voltage, or chemical upgrades creates massive safety liabilities. Knowing your actual skill boundaries keeps your family safe and saves tens of thousands of dollars in emergency contractor repair bills.

    Electrical and Gas Work

    High voltage power and flammable fuel lines require specialized tools, precise calculations, and master licensing to prevent tragic accidents.

    Main Panel Upgrades

    Handling main breaker feeds presents extreme arc flash risks and lethal electrical shock.

    Upgrading your electrical panel to handle modern power demands requires working directly with unmetered utility feeds. High voltage risks severe shocks or death, making this a task strictly for master electricians who follow strict municipal safety codes. A single slipped screwdriver can trigger a massive electrical arc that ruins your service line and causes fatal injuries.

    Licensed contractors coordinate directly with local power companies to shut off main service before installing fresh breaker boxes. They balance household electrical loads to ensure your modern appliances run efficiently without overloading circuits or tripping breakers constantly.

    New Wiring and Circuits

    Adding fresh electrical branches without proper load math creates hidden fire traps inside your walls.

    Running fresh wiring through studs seems straightforward until incorrect wire loads cause electrical fires inside hidden wall cavities. Overloading a circuit breaker or choosing thin wire gauges causes conductors to overheat silently behind dry wall. The The Spruce home improvement guide notes that faulty wiring remains a top cause of preventable house fires across the country.

    Certified electricians calculate total circuit capacity and install correct arc fault breakers to protect your household. They ensure every junction box is fully grounded and sealed against short circuits, giving you total peace of mind for decades.

    Gas Line Changes

    Altering fuel pipes requires precision threading and specialized pressure testing to prevent catastrophic gas buildup.

    Extending a gas pipe for a gourmet kitchen stove or patio grill requires specialized threading compounds and calibrated pressure gauges. Tiny leaks from bad seals trigger explosions when trapped gas accumulates inside unventilated home spaces. Home inspectors at Nashville TN Home Inspections emphasize that gas line errors are among the most dangerous defects found during home sales.

    Professional plumbers perform rigorous pressure drop tests to confirm every joint is completely airtight before restoring fuel flow. Relying on certified gas technicians protects your neighborhood and ensures your installation passes municipal safety inspections cleanly.

    Plumbing and Water Systems

    Water flows under constant pressure, meaning small piping blunders quickly turn into massive structural rot and biohazards. At times, these renovations might also require permits.

    Plumbing and Water Systems

    Behind The Wall Pipes

    Concealed water leaks slowly destroy wood framing and create expensive environmental health problems.

    Installing supply lines inside wall cavities requires flawless soldering and press-fitting skills to handle continuous municipal water pressure. Hidden leaks rot floor joists and grow toxic mold behind your drywall long before visible stains appear on your ceiling. Real estate experts at M/I Homes warn that structural moisture damage dramatically reduces home appraisal values during resale.

    Master plumbers use specialized pressure testing equipment to verify that new supply lines hold strong under peak household demand. Investing in professional pipe installation prevents sudden line bursts that ruin finished basements and destroy personal belongings.

    Main Sewer Lines

    Discharge piping relies on exact gravity pitching to carry waste away without backing up into your living areas.

    Connecting new bathroom fixtures to your main drain stack requires precise pitch calculations and specialized heavy duty pipe fittings. Improper slopes back up waste into the home, flooding your floors with hazardous sewage that requires expensive professional cleanup. A pitch that is too steep leaves solids behind, while a pitch that is too flat stops wastewater from moving altogether.

    Licensed drainage experts use specialized video scope cameras to inspect the internal condition and alignment of your waste pipes. They guarantee that every drain line meets exact slope standards, keeping your plumbing system flowing smoothly without foul odors or backup risks.

    Structural and Exterior Elements

    Modifying load bearing framing, high roofs, or hazardous materials carries high injury risks and structural failure hazards.

    Structural and Exterior Elements

    Removing Load Bearing Walls

    Tearing out structural interior walls without temporary support beams compromises the integrity of your whole roof.

    Open floor plans are visually appealing, but cutting wrong supports makes ceilings cave in and distorts your entire home frame. Structural guidance from Southern Living shows that removing support studs without proper temporary headers causes severe ceiling sagging and cracked finishes. Professional builders calculate live weight loads and install custom steel or engineered LVL beams according to strict local building codes.

    Contractors secure temporary support walls before removing any original studs, ensuring the structural weight transfers safely. Their precision work prevents foundation shifting, wall cracking, and structural collapse, keeping your family completely safe during major layouts.

    Roof Replacement

    Working on steep roof pitches exposes you to fall risks while requiring precise flashing techniques to stop leaks.

    Replacing worn roofing shingles requires physical endurance, specialized harnesses, and exact underlayment layering to shed driving rain. High falls lead to grave injuries, making steep elevation repairs one of the most hazardous home maintenance jobs. Professional roofers bring safety equipment, steep pitch gear, and weatherproofing skill to every job site.

    Experienced crews strip old materials down to the plywood deck, replacing rotted wood and installing ice shields along roof valleys. Their detailed work prevents subtle water intrusion that rots rafters and damages insulation, protecting your interior ceilings for decades.

    Asbestos Removal

    Asbestos Removal

    Disturbing old insulation or floor tiles releases microscopic mineral fibers that pose severe respiratory health risks.

    Homes built before the 1980s often contain hazardous asbestos inside duct insulation, pop-corn ceiling textures, or vinyl floor tiles. Breathing fibers causes permanent lung damage and chronic respiratory illnesses that develop quietly over several decades. Attempting to scrape or tear out these materials without containment scatters dangerous dust throughout your home HVAC system.

    Certified environmental abatement technicians seal off work areas with negative air pressure machines and wear specialized respirator protection. They dispose of dangerous waste according to strict federal regulations, ensuring your living space remains clean, healthy, and hazard free.

    Mastering Your Project Scope: Renovation Tasks You Should Not DIY

    Following a clear evaluation process keeps your home improvement project safe, legal, and within budget.

    Start by evaluating your planned renovation against strict trade safety boundaries before buying tools or demolition equipment. Identify whether your project touches main electrical panels, fuel gas connections, load bearing walls, or hidden supply plumbing. If any of these high risk systems are involved, stop immediately and request detailed proposals from three licensed trade contractors.

    Next, contact your local municipal building department to check permit requirements and home inspection steps for your area. Confirm that your hired tradespeople carry active general liability and worker compensation insurance policies. Securing qualified professionals early prevents expensive project stalls, protects your home equity, and ensures complete building code compliance.

    Frequently Asked Questions

    1. What home improvement projects should I avoid doing myself? 

    You should avoid structural wall removals, main electrical panel upgrades, gas line modifications, roof replacements, and main sewer line work. These complex tasks carry extreme life safety hazards, severe property damage risks, and costly building code violations.

    2. What is the 30% rule for renovations? 

    The 30% rule suggests limiting your total renovation expenditure to 30% of your property’s current total market value. Furthermore, smart homeowners set aside an extra 20% to 30% contingency fund to cover unexpected structural or mechanical repairs.

    3. What are common renovation mistakes to avoid? 

    Common mistakes include skipping required building permits, hiring uninsured workers, ignoring contingency budgets, and attempting dangerous trade tasks without licensing. These blunders lead to denied insurance claims, structural defects, and severe financial losses during resale.

    4. What should you not DIY? 

    You should not DIY high voltage wiring, gas line extensions, load bearing wall removals, asbestos abatement, or slab plumbing repairs. Hiring licensed, bonded, and insured professionals protects your physical safety and preserves your long term home equity.

    Put Down the Sledgehammer

    Protecting your home investment requires knowing when to put down the tools and call certified professionals for renovation tasks you should not DIY. Partnering with licensed trades safeguards your family’s safety, ensures strict building code compliance, and preserves your equity. Smart homeowners know that paying for professional craftsmanship today prevents catastrophic emergency repairs and maintains full property value for the future.

  • How to Choose the Right Location for Property Investment

    How to Choose the Right Location for Property Investment

    I have learned that an attractive property can become a weak investment when the surrounding market cannot support reliable rent, steady demand, or a profitable resale. That is why I research the area before becoming attached to the building. 

    When studying how to choose the right location for property investment, I focus on employment, population trends, rental demand, housing supply, ownership costs, local rules, and resale potential.

    Define Your Investment Goal

    The right location depends on what you want the property to achieve. A market suited to a vacation rental may not work for a family home, student apartment, or long-term rental. Decide whether your priority is cash flow, appreciation, renovation profit, or balanced returns.

    Identify your likely tenant too. Families may value schools, parks, and quiet streets. Professionals often prioritize commute times and walkability. Students usually need campus access and affordable rent. Choosing the tenant first helps you judge whether an area supports your plan.

    Study Employment and Population Trends

    Study Employment and Population Trends

    A dependable property market needs a healthy economy. Research job growth, unemployment, wages, population movement, and household formation. Markets supported by several industries may be safer than towns dependent on one employer.

    Look for consistent growth rather than one impressive year. Population gains matter most when local incomes can support rents and property prices. Review Census information, federal labor data, state reports, and local development plans before trusting promotional claims.

    Confirm Future Development

    Hospitals, highways, transit stations, universities, and business campuses can increase housing demand. However, an announcement does not guarantee growth. Check whether a project is approved, funded, under construction, and expected to create permanent jobs.

    Measure Rental Demand

    A growing city does not automatically guarantee a profitable rental. Examine vacancy rates, rent growth, available listings, leasing concessions, and average days on market. Ask local property managers which homes rent quickly and which sit vacant.

    Compare similar rentals nearby. Condition, parking, outdoor space, and proximity to employment can affect achievable rent. Advertised rent is only an asking price, so use several comparable properties and estimate conservatively.

    Compare Demand With Housing Supply

    Strong demand can be weakened by excessive construction. Review building permits, apartment developments, subdivision approvals, zoning changes, and planned inventory. A city may gain residents while rents remain flat because developers are adding homes even faster.

    Look for sustainable demand without an overwhelming pipeline of competing properties. Also check whether restrictive zoning could make renovations or future development difficult.

    Calculate the Real Return

    Calculate the Real Return

    Never select an area based only on rising home prices. Estimate realistic rent, then subtract property taxes, insurance, management, maintenance, utilities, association fees, vacancy, repairs, and replacement costs.

    Compare rental yield, capitalization rate, cash-on-cash return, and price-to-rent relationships across several neighborhoods. Test each deal against a vacant month, higher insurance, an expensive repair, or slower rent growth.

    A prestigious neighborhood may produce weak cash flow because its purchase price is too high. A cheaper area may offer a stronger yield but carry greater vacancy or resale risk.

    Analyze the City, Neighborhood, and Street

    At the metropolitan level, study jobs, population, regulations, economic diversity, and housing supply. At the neighborhood level, review schools, crime, healthcare, shopping, parks, transportation, walkability, and commute times.

    Then inspect the individual street. Noise, traffic, poor lighting, neglected properties, industrial activity, limited parking, or drainage problems can reduce tenant interest. Visit during weekdays, evenings, and weekends.

    Check Taxes, Insurance, Hazards, and Rules

    Property expenses differ across American states, counties, and cities. Compare tax rates, insurance costs, rental registration, inspections, landlord laws, licensing, and association restrictions.

    Research flood zones, wildfire exposure, hurricanes, extreme heat, water availability, and previous storm damage. A low-priced property can become costly when insurance is difficult to obtain or premiums rise sharply.

    Short-term rental investors should also verify zoning, permits, occupancy limits, neighborhood rules, and lodging taxes.

    Evaluate Resale Demand

    Evaluate Resale Demand

    Every investment needs an exit plan. Study sales volume, days on market, price reductions, buyer demographics, and the future buyer pool. Properties that appeal to investors and owner-occupants often provide more flexibility.

    Warning signs include population decline, dependence on one industry, rising inventory, falling rents, weak sales activity, expensive insurance, or prices based mainly on promised development.

    Use a Location Scorecard

    A scorecard can make how to choose the right location for property investment more objective. Give each market points for tenant demand, employment, financial return, housing supply, neighborhood quality, taxes, regulation, physical risk, and resale potential.

    Compare at least three locations using the same standards. A scorecard cannot replace inspections or financial advice, but it can prevent emotional decisions based on hype or one attractive statistic.

    Frequently Asked Questions

    1. What Matters Most When Learning How to Choose the Right Location for Property Investment?

    Focus on sustainable tenant demand, stable employment, affordable prices, manageable expenses, limited competing supply, and realistic resale potential. Schools, transportation, safety, taxes, insurance, and local laws also matter.

    2. Is a Fast-Growing City Always a Strong Investment Market?

    No. Growth may be offset by excessive construction, weak wages, high prices, rising taxes, or expensive insurance.

    3. Should I Invest in an Urban or Suburban Area?

    Urban properties may offer transportation, walkability, and a larger renter pool. Suburban homes may attract families, create longer tenancies, and have lower entry prices.

    A Smarter Way to Choose Your Market

    I would never buy an investment property simply because a city appears on a popular “best places” list. I want evidence that people can find work, afford rent, enjoy the neighborhood, and continue demanding homes while my expenses remain manageable.

    By comparing economic strength, rental demand, supply, returns, street conditions, regulations, hazards, and resale liquidity, I can decide based on evidence instead of excitement. That disciplined process gives me a repeatable way to identify markets with stronger long-term potential.


  • Soil Testing Cost Before Building a House: What the Ground Could Cost You

    Soil Testing Cost Before Building a House: What the Ground Could Cost You

    Before I approve a foundation plan, I want to know what is happening below the surface. A lot may look stable while hiding expansive clay, loose fill, shallow groundwater, or weak layers that could cause settlement. Understanding the soil testing cost before building a house helps me budget for a professional investigation before excavation begins.

    For a standard US home, a complete geotechnical investigation generally costs $1,000 to $5,000. Many homeowners spend around $2,700 to $2,900, although drilling access, regional rates, soil complexity, and the number of boreholes affect the final price.

    Unlike a basic garden test, this engineering-grade evaluation measures soil composition, stability, drainage, and load-bearing behavior. The results help the design team reduce the risk of a foundation cracking, shifting, settling, or sinking.

    How Much Does Residential Geotechnical Testing Cost?

    I treat the following amounts as planning ranges rather than fixed nationwide prices because every property requires a site-specific scope.

    Project scope Typical cost range Likely work included
    Basic home on a flat lot $1,000–$3,000 Two or three boreholes, routine laboratory tests, and a signed report
    Larger home or hillside site $3,000–$7,000 Additional samples, slope analysis, clay testing, or groundwater review
    Complex custom build $7,000–$15,000+ Deep drilling, difficult access, coastal or seismic studies, and piling recommendations

    A basic residential assessment normally suits a standard single-family home on flat, predictable suburban soil. Larger homes, multistory structures, steep terrain, severe expansive clay, coastal cliffs, and high water tables require more investigation.

    Large custom estates may also need deep structural pilings or specialized slope-stability analysis. Regional pricing shows that hillside and complex sites often cost significantly more than simple residential lots.

    What Is Included in a Geotechnical Report Price?

    What Is Included in a Geotechnical Report Price?

    A residential geotechnical quote generally combines field exploration, laboratory testing, engineering analysis, and a final report. Firms package these services differently, so some of the ranges may overlap.

    Service phase Planning range What it usually covers
    Fieldwork and drilling $1,000–$4,500 Mobilization, drilling-rig operation, soil sampling, and technician labor that may run about $300–$800 per day
    Laboratory testing $500–$2,500 Moisture, density, compaction, Atterberg limits, shear strength, and other selected tests
    Geotechnical report $500–$2,000 Engineering review and foundation recommendations signed or stamped by a licensed Professional Engineer

    Published US cost guides place two residential soil borings at approximately $700 to $1,500. Each additional borehole may add $300 to $900.

    A standard single-family project may require two or three boreholes approximately 10 to 20 feet deep. However, weak soil, deep fill, groundwater, rock, or planned pilings may require deeper exploration.

    What Makes Pre-Construction Soil Testing More Expensive?

    Project type also affects how I interpret construction pricing. Reviewing the office build-out cost per square foot can help me see how site conditions, engineering requirements, permits, utility work, and hidden structural needs can raise costs well beyond a basic headline estimate.

    Does the home’s size or number of stories affect the price?

    Yes. A larger building footprint requires broader subsurface coverage and potentially more sampling locations. A heavy or multistory home may also create greater structural loads, requiring deeper drilling and more detailed foundation analysis.

    Which soil and terrain conditions increase the cost?

    Which soil and terrain conditions increase the cost?

    Steep slopes, narrow access, trees, retaining walls, wetlands, overhead lines, rocky ground, uncontrolled fill, soft sand, expansive clay, and shallow groundwater can all increase the price.

    The geotechnical engineer may also need to investigate settlement, liquefaction, drainage, slope stability, permeability, soil improvement, or deep-foundation requirements.

    Do permits and utility locating add extra fees?

    Local building codes vary across the United States. Some municipalities require a stamped geotechnical report before issuing a residential building permit. Others require one only when the property has steep slopes, unstable fill, unusual geology, seismic exposure, or another recognized hazard.

    Private utility locating or site-marking services may add approximately $200 to $500. The national 811 service itself is free and should be contacted before drilling so participating utility companies can mark the approximate locations of buried lines.

    How much does expedited soil testing cost?

    A straightforward residential investigation may take about two to four weeks, although scheduling delays, laboratory workload, and complex analysis can extend the process.

    When I need a report quickly for a land closing, construction loan, or permit deadline, expedited processing may increase the total by approximately 20% to 40%.

    Which Soil Test Do I Need Before Building a Home?

    A geotechnical investigation evaluates soil stability, bearing capacity, groundwater, settlement potential, and appropriate foundation options.

    A percolation test serves a different purpose. It measures how quickly water drains through the ground and helps determine whether a property can support a septic system.

    Environmental soil testing may also be necessary when the land previously contained a gas station, agricultural operation, industrial building, landfill, or another use associated with petroleum, pesticides, lead, heavy metals, or hazardous materials.

    I would never replace professional residential soil testing with a DIY kit. Garden kits may measure nutrients or pH, but they cannot establish bearing capacity, settlement risk, slope stability, or a safe foundation design.

    How Can Soil Results Change My Foundation Cost?

    Favorable test results may support conventional shallow footings or a slab-on-grade foundation. Difficult conditions may lead to over-excavation, engineered fill, moisture conditioning, wider footings, reinforced slabs, drainage improvements, piers, piles, or another specialized foundation system.

    Some corrective work also falls outside safe homeowner capability. Reviewing renovation tasks you should not DIY can help me recognize when excavation, structural reinforcement, foundation repair, drainage correction, electrical relocation, or other high-risk work requires licensed professionals.

    Those recommendations can increase my initial building budget. However, discovering unstable ground after pouring concrete is far more disruptive.

    Emergency engineering redesigns and foundation remediation can cost $20,000 to $50,000 or more. A detailed report may also prevent unnecessary spending by giving the structural engineer site-specific information instead of forcing overly conservative assumptions.

    How Do I Choose a Geotechnical Engineer?

    How Do I Choose a Geotechnical Engineer?

    I look for a firm with residential construction experience and a Professional Engineer licensed in the state where I plan to build.

    Before hiring anyone, I ask how many boreholes the quote includes, how deep the crew expects to drill, which laboratory tests are covered, and whether the completed report will satisfy the local building department.

    I also confirm the turnaround time, access requirements, insurance, payment schedule, utility-marking responsibilities, and charges for additional visits or report revisions. The engineer should also be willing to answer questions from my architect, structural engineer, lender, builder, or permit reviewer.

    Comparing identical scopes gives me a more accurate picture than simply selecting the lowest advertised price.

    Frequently Asked Questions 

    1. Is a soil report required before building every new house?

    No nationwide rule applies equally to every residential project. Local building codes, slopes, fill soil, groundwater, foundation type, seismic exposure, and regional geology determine whether testing is mandatory.

    2. Is a perc test the same as a geotechnical test?

    No. A perc test evaluates soil drainage for septic-system planning. A geotechnical investigation evaluates the ground for foundation and earthwork decisions.

    3. Can soil testing tell me which foundation to use?

    The report provides soil and groundwater information that helps the structural engineer select and design an appropriate foundation. It may recommend shallow footings, a reinforced slab, engineered fill, piers, piles, or additional drainage.

    4. Should I test the soil for radon before construction?

    The EPA does not recommend soil testing as a reliable way to predict indoor radon levels in the completed house. Soil conditions can change during site preparation, and a low soil result cannot rule out a future radon problem. The EPA recommends testing the completed home.

    Is Professional Soil Testing Worth the Price?

    When I assess the soil testing cost before building a house, I compare it with my much larger investment in excavation, concrete, framing, and long-term structural performance.

    Spending approximately $1,000 to $5,000 on qualified testing can reveal risks early, guide the foundation design, support the permit process, and prevent expensive construction surprises. The best value comes from appropriate fieldwork, reliable laboratory analysis, and practical recommendations from a licensed engineer—not simply the cheapest quote.

  • Slab Foundation vs Crawl Space Cost: The Price Tag Is Only Half the Story

    Slab Foundation vs Crawl Space Cost: The Price Tag Is Only Half the Story

    Choosing a foundation can feel like a simple numbers decision until excavation, plumbing access, moisture control, and future repairs enter the picture. When I compare slab foundation vs crawl space cost, I find that a concrete slab usually wins on upfront affordability, while a crawl space may offer greater flexibility over the life of the home. 

    The right choice depends on more than the initial quote—it also depends on your soil, climate, lot slope, drainage conditions, and how much you value easy access to plumbing and HVAC systems.

    How Much Does a Slab Foundation Cost Compared With a Crawl Space?

    National figures help with planning, but local labor, materials, permits, engineering, and site preparation can change the final quote.

    Cost factor Concrete slab Crawl space
    Typical upfront cost $4,000–$14,000 $7,000–$21,000
    Cost per square foot $4–$14 $5–$16
    Excavation and labor Usually limited and faster Usually greater and slower
    Routine maintenance Generally low Moisture and pest checks needed
    Utility access Difficult beneath concrete Easier from below
    Best fit Flat, stable sites Sloped or elevated sites

    The slab usually wins on initial price because it combines the foundation and lower floor into one concrete system. A crawl space raises the house above grade and requires more structural components.

    Why Does a Crawl Space Foundation Cost More Upfront?

    Why Does a Crawl Space Foundation Cost More Upfront?

    Does a Crawl Space Require More Excavation?

    A slab sits on a prepared, compacted base near ground level. A crawl space generally requires excavation for footings and walls, interior grading, and clearance beneath the floor. Excavation may cover much of the footprint or focus around the perimeter, but it usually requires more digging and equipment than a slab. The final sitework budget can also be influenced by factors such as soil conditions, drainage requirements, and the perc test cost for rural land.

    Which Extra Materials Raise the Price?

    Crawl spaces may require poured footings, concrete or masonry walls, piers, beams, wooden floor joists, subflooring, insulation, drainage, and an access opening. Builders may also install vents or create a sealed, conditioned space.

    A slab still needs a compacted subbase, reinforcement, planned utilities, concrete, and moisture protection. It usually avoids the elevated wooden floor system, saving materials and labor.

    Why Does Labor Cost More?

    A slab can be prepared and poured quickly when the lot is level and the soil is suitable. A crawl space requires excavation, footings, walls, supports, floor framing, insulation, and moisture control. That longer process raises labor costs.

    Which Foundation Has Lower Long-Term Costs?

    A slab has fewer exposed components and normally needs little routine maintenance. Homeowners do not have to inspect an underfloor area for damaged insulation, pests, standing water, or humidity.

    The main financial concern is repair access. Plumbing lines often run within or beneath the concrete. A serious leak may require electronic detection, flooring removal, concrete cutting, or pipe rerouting.

    A crawl space makes plumbing, wiring, ductwork, and some HVAC components easier to reach. A plumber can often repair a line from below without breaking through a finished floor. That access can reduce costs and disruption.

    How Much Does Crawl Space Encapsulation Cost?

    Traditional vented crawl spaces can develop moisture, mold, wood rot, damaged insulation, and pest problems, especially in humid areas. The US Department of Energy’s Building Science Education guidance recommends controlling ground moisture with an effective sealed barrier and proper drainage.

    Basic work on a smaller crawl space may start around $2,000 to $6,000, but current professional projects often total $5,000 to $15,000. Large spaces, mold treatment, sump pumps, and dehumidifiers can raise the price further. Encapsulation improves moisture control but widens the upfront cost gap.

    Is a Slab or Crawl Space Better for My Climate?

    Slabs are common in warmer regions where deep frost protection is less demanding. They work best on flat, stable, well-drained sites. Under-slab vapor protection and slab-edge insulation still matter because concrete can transfer moisture and heat.

    Crawl spaces may suit sloped lots, deeper frost lines, or homes that need elevation above grade. They also provide accessible utilities. However, builders must address local humidity, groundwater, drainage, insulation, and energy-code requirements.

    Buyers in colder markets may be more familiar with crawl spaces or basements, while slabs are widely accepted across many Southern and Southwestern markets. Foundation type alone does not guarantee a higher resale price. Structural condition, moisture history, and repair records often matter more.

    Which Foundation Works Better on a Sloped or Rural Lot?

    Which Foundation Works Better on a Sloped or Rural Lot?

    On a level rural property, a slab may offer the cheapest and fastest solution. On a sloped parcel, grading, compaction, and retaining work can erase some of those savings.

    A crawl space can accommodate moderate elevation changes by varying wall or pier heights. Before choosing, I would order a soil evaluation and discuss expansive clay, weak fill, groundwater, flooding, frost depth, and drainage with a local engineer or foundation contractor.

    Frequently Asked Questions (FAQs)

    1. Is a Slab Foundation Always Cheaper Than a Crawl Space?

    A slab is usually cheaper for straightforward construction, but difficult soil, extensive grading, piers, drainage work, or specialized engineering can increase its price.

    2. How Much Would Each Foundation Cost for a 1,500-Square-Foot House?

    Using broad national rates, a slab could cost about $6,000 to $21,000, while a crawl space could cost roughly $7,500 to $24,000. Actual foundation size may differ from total living area.

    3. Which Option Is Better for Plumbing Repairs?

    A crawl space generally provides easier access. Slab plumbing may require cutting concrete or rerouting pipes when a leak develops below the floor.

    4. Does a Crawl Space Add Resale Value?

    It may appeal to buyers where elevated foundations are common, but a damp or poorly maintained crawl space can reduce buyer confidence.

    Final Verdict

    After comparing slab foundation vs crawl space cost, I find that a slab normally delivers the lowest upfront price and simplest maintenance. A crawl space costs more to build and protect from moisture, but it offers useful utility access and adapts better to some slopes, climates, and flood-prone sites

    The smartest decision comes from comparing local bids that include excavation, structural work, drainage, insulation, encapsulation, and long-term repair access.

  • 10 Steps to Decide What Order to Remodel a House

    10 Steps to Decide What Order to Remodel a House

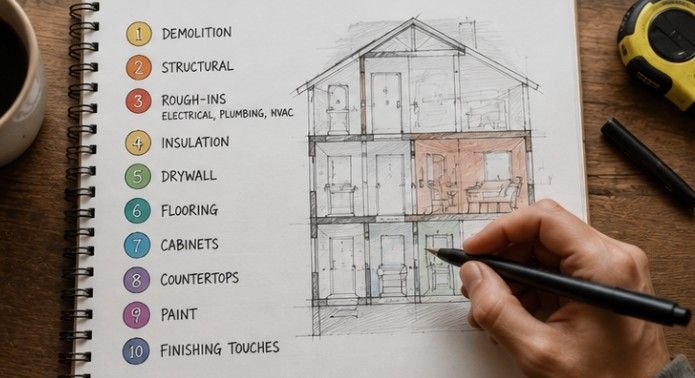
    Building your dream living space quickly turns into a chaotic money pit if you tackle project steps out of sequence. Having managed multi-room transformation projects through every messy phase, experience proves that sticking to a strict construction dependency sequence saves thousands. Figuring out what order to remodel a house isn’t just about personal style; it is about keeping trades working smoothly without destroying previous progress.

    Step 1: Planning, Design, and Securing Permits

    Before swinging a single hammer, establishing a clear structural plan prevents costly change orders down the road.

    Setting Budgets and Material Choices

    Every successful home transformation begins long before construction crews step foot on your property. You need to draft detailed architectural scope documents, establish firm material budgets, and select key fixtures early. Sourcing custom cabinetry, tile, and appliances early prevents project halts while workers wait for delayed shipments.

    Getting Local Building Permits

    Skipping municipal building permits might feel like a clever shortcut, but unpermitted structural or electrical alterations cause major issues later. City inspectors ensure your wiring, plumbing shifts, and load-bearing beam modifications meet safety codes. Securing official permits protects your home value and guarantees smooth transactions when you eventually sell.

    Step 2: Exterior Repairs and Demolition

    Once plans clear, heavy tear-out work clears away old materials to build a clean baseline for construction.

    Fixing Roofs and Sealing Exterior

    Never invest in high-end interior finishes until your exterior building envelope remains completely airtight and watertight. Repairing sagging roof rafters, replacing leaking skylights, and sealing foundation walls happen right here. Securing windows and doors keeps indoor construction zones protected against weather damage during upcoming wall installations.

    Controlled Interior Tear-Out

    Heavy demolition removes outdated fixtures, custom cabinets, and unwanted interior partition walls to prepare the space. Demolition clears out worn subflooring and exposes the bare structural bones of your residence. Staging dumpsters on-site handles heavy debris, keeping pathways clear so subcontractors can safely move equipment inside.

    Step 3: Framing and Structural Modifications

    With the house opened up, carpenters step in to build the functional structural backbone of your living area.

    Step 3 Framing and Structural Modifications

    Building Walls and Support Beams

    Framing crews construct new room layouts, alter interior doorway headers, and reinforce floor joists to support heavy stone counters. Opening up closed floor plans requires engineered support beams to safely transfer structural loads. This stage establishes the physical footprint for all future cabinetry, plumbing fixtures, and lighting locations.

    Repairing Hidden Framing Issues

    Exposing internal wall bays often reveals past water damage, termite activity, or sagging structural elements that require immediate attention. Carpenter teams sister damaged joists and level uneven subfloors before proceeding to interior trade work. Resolving structural issues now prevents sloping floors and cracked drywall after your project finishes.

    Step 4: Rough-In Mechanical Systems

    Closing up open wall bays turns a chaotic, dusty jobsite into an actual recognizable living area.

    Running MEP Utilities in Open Walls

    Contractors follow a strict order during system rough-ins: bulky HVAC ductwork goes in first, followed by sloped plumbing drain lines, and flexible electrical wiring last. Routing electrical wires around rigid plumbing pipes prevents accidental trade conflicts behind enclosed spaces. Installing these core utilities while studs remain bare ensures fast, efficient runs.

    Passing Municipal Rough Inspections

    Once all mechanical runs are positioned, city building inspectors review the open framing to approve safety code compliance. Inspectors check wire gauges, plumbing pressure, and duct placement before anything gets covered up. Passing this official review gives you green light approval to insulate and seal wall cavities.

    Step 5: Insulation and Drywall Installation

    Adding insulation and hanging wallboards transforms bare framing into defined, comfortable room spaces.

    Fitting Wall and Ceiling Insulation

    Proper thermal insulation gets fitted snugly into open wall cavities, crawlspaces, and ceiling joists. Spray foam or mineral wool batts deliver essential soundproofing and energy efficiency throughout living areas. Sealing these spaces creates a comfortable indoor climate and lowers monthly utility heating costs.

    Hanging, Taping, and Mudding Drywall

    Drywall crews lift, screw, tape, and coat gypsum boards across all exposed interior walls and ceiling planes. Multiple thin coats of joint compound are applied, followed by extensive sanding to achieve seamless surfaces. Proper drying time between mudding coats prevents future joint cracking when structural temperatures shift across seasons.

    Step 6: Painting and Wall Preparation

    Executing finish materials in the right order preserves your expensive surface choices from accidental damage.

    Step 6 Painting and Wall Preparation

    Painting Ceilings and Wall Priming

    Applying primer and initial paint coats before laying new flooring speeds up work and eliminates stress. Painters work freely using extension poles and ladders without worrying about paint splatter landing on brand-new surfaces. Getting overhead ceiling painting completed early protects low-level finishes from dripping mess.

    Protecting Surfaces Before Floor Work

    Completing major wall painting tasks ahead of finish flooring keeps your construction site organized and clean. Primer seals fresh drywall paper so topcoat paint glies on smoothly with vibrant, even coverage. A simple final touch-up coat happens much later after all heavy cabinet installations finish.

    Step 7: Finish Flooring Installation

    Laying down quality flooring creates a level foundation for all built-in woodworking and trim elements.

    Installing Hardwood, Tile, or Vinyl

    Laying finished flooring across entire rooms before setting base cabinets creates a flat plane and seamless aesthetic. Modern Luxury Vinyl Plank or solid hardwood floors extend wall-to-wall so future appliance replacements slide out effortlessly. Tile work in bathrooms and kitchens gets grouted and sealed before fixture setting.

    Curing and Protecting New Floors

    Newly laid flooring requires proper curing time and protective covering before heavy trades roll in cabinets. Contractors lay heavy builder board paper across wood and tile to prevent scratches from boots or falling tools. Keeping floors covered guarantees your pristine investment stays flawless until move-in day.

    Step 8: Cabinetry and Architectural Trim

    Setting custom woodworking shapes the functionality and character of your newly renovated kitchen and living spaces.

    Mounting Base and Wall Cabinets

    Carpenters anchor heavy kitchen base cabinets directly into wall studs for solid, level countertop support. Precision leveling ensures cabinet boxes sit flush across floor spans without awkward gaps along walls. Setting upper wall cabinets completes the layout framework required for precision countertop measurement.

    Fitting Countertops and Interior Trim

    Fabricators template, cut, and secure durable stone countertops directly over level base cabinet structures. Finish carpenters follow closely behind to install decorative baseboards, door casings, window trim, and crown molding. Sharp trim carpentry covers expansion gaps around flooring and gives rooms a polished appearance.

    Step 9: Final Fixture Trim-Out

    The final transformation stage brings your renovated home to life with working power, running water, and sparkling details.

    Step 9 Final Fixture Trim-Out

    Connecting Electrical and Plumbing Hardware

    Electricians mount designer light fixtures, decorative switch plates, and cover outlets across every room. Plumbers connect sink faucets, garbage disposals, shower heads, and toilets to previously inspected rough piping. Testing every fixture guarantees leak-free operation and smooth electrical performance throughout your home.

    Installing Appliances and Punch List Review

    Heavy kitchen appliances slide into place, hooking directly into designated gas, water, and electrical connections. You conduct a thorough final walkthrough with your general contractor to build a detailed punch list. Fixing minor paint touch-ups and cabinet adjustments marks the official completion of your house remodel.

    Also read: Permits Needed for Your Next Home Renovation

    Frequently Asked Questions

    1. In what order should a house be renovated?

    A house should be renovated by completing planning and permits first, followed by exterior repairs, demolition, framing, utility rough-ins, insulation, drywall, painting, flooring, cabinetry, and final fixture connections. Following this logical sequence prevents damage to completed work and avoids costly contractor delays.

    2. What are the biggest home renovation mistakes?

    The biggest mistakes include skipping municipal permits, changing design plans mid-construction, ordering materials late, failing to set a contingency budget, and installing finish flooring before completing messy drywall sanding or ceiling painting tasks. Avoiding these errors saves thousands of dollars during your remodel.

    3. What is the most expensive part of a house to remodel?

    Kitchens and primary bathrooms represent the most expensive spaces to remodel due to high material costs and skilled labor requirements. Shifting plumbing lines, upgrading electrical panels, buying custom cabinetry, and installing stone countertops quickly drive up overall project expenses per square foot.

    4. What is the 30% rule for renovations?

    The 30% rule states that your total home renovation budget should not exceed 30% of your property’s total market value. Additionally, it recommends holding a 20% to 30% cash buffer within your overall budget to handle unexpected structural or electrical issues uncovered during demolition.

    You Made It to the Finish Line!

    Mastering what order to remodel a house turns a potentially chaotic project into an exciting, structured home improvement success. When you follow logical dependencies—securing the building shell, running mechanical utilities early, and saving finish details for last—you protect your budget every step of the way. Map out your renovation timeline today, partner with trusted trade professionals, and enjoy your beautifully transformed home!

  • Construction Loan When You Already Own the Land: How It Works

    Construction Loan When You Already Own the Land: How It Works

    Building a custom home may become easier when I already own the lot. The land can reduce my cash contribution and strengthen the project. A construction loan when you already own the land is short-term financing that pays building costs in stages. The lender still reviews my credit, income, plans, builder, budget, permits, and the expected value of the finished home.

    Can I Use Land Equity as My Construction Loan Down Payment?

    Often, yes. Land equity equals the lot’s accepted value minus any debt secured by it. If my land appraises for $120,000 and I owe $20,000, I have about $100,000 in net lot equity.

    That equity may cover part or all of the required contribution. FHA guidance has recognized land equity as a possible source of borrower investment, while conventional construction-to-permanent programs apply their own loan-to-value requirements. Fannie Mae guidance uses an 80% LTV threshold when determining when borrowers must contribute personal funds. Zero-cash approval may therefore be possible, but it is never guaranteed.

    What Happens If I Own the Lot Free and Clear?

    What Happens If I Own the Lot Free and Clear?

    Suppose my lot is worth $100,000 and construction costs $400,000. The total project cost is $500,000. If the lender finances 80%, the required equity would be $100,000, so the land could potentially satisfy it.

    The projected value may also reflect location, design, energy efficiency, connected features, and broader smart home market trends that influence buyer demand and appraiser comparisons for newly built properties.

    Some lenders advertise financing around 80% to 85% of total project cost. However, that range is not a universal US standard. The limit may depend on the loan-to-cost ratio, as-completed value, occupancy, credit, builder experience, and loan program.

    Even when my land covers the down payment, I may still need money for closing costs, prepaid interest, cash reserves, design changes, or expenses excluded from the approved construction budget.

    What If I Still Owe Money on the Land?

    I may still qualify. The new financing can pay off the existing land loan at closing, after which the lender records a first lien against the property. Fannie Mae recognizes transactions that use construction financing to pay existing lot liens and fund a new residence. Only my net equity counts toward the required contribution.

    For example, a lot valued at $100,000 with a $70,000 loan balance provides only $30,000 in net equity. A lower-than-expected appraisal could also increase the amount of cash I must provide.

    Which Construction Loan Structure Should I Choose?

    The two primary options are a construction-to-permanent loan and a standalone construction loan. Each affects my closing costs, interest-rate risk, and long-term financing differently.

    How Does a Construction-to-Permanent Loan Work?

    A construction-to-permanent loan, also called a one-time-close or single-close loan, combines building financing and the permanent mortgage. I close once, usually pay one main set of closing costs, and avoid applying for another mortgage after completion.

    The lender releases money through draws and later converts the balance into a long-term mortgage. Fannie Mae supports both single-closing and two-closing construction-to-permanent transactions. USDA also offers single-close financing through participating lenders for eligible rural borrowers.

    This structure may allow me to secure interest-rate terms before construction begins. However, I should review the rate-lock period, extension fees, conversion requirements, and rules that apply if the project runs late.

    When Is a Standalone Construction Loan Better?

    When Is a Standalone Construction Loan Better?

    A standalone construction loan funds only the building phase. I must repay it with cash, sale proceeds, or a separate permanent mortgage when the home is finished.

    Two applications and closings can increase costs. However, this structure may suit me if I plan to sell my current home later, make a larger down payment after construction, or shop for permanent mortgage rates near completion.

    The trade-off is refinancing risk. My credit, employment, income, property value, or market rates could change before I obtain the second loan.

    How Does the Construction Loan Process Work?

    First, the lender orders an appraisal covering the existing land and the proposed finished home. I submit building plans, specifications, a line-item budget, contractor agreement, timeline, and current permits.

    The lender then reviews my finances and approves the builder’s license, insurance, and experience. At closing, the loan may pay existing land liens and establish the lender’s security interest.

    Funds are released through a draw schedule tied to milestones such as the foundation, framing, roofing, mechanical systems, drywall, and final completion. Inspections confirm progress before payment. CFPB rules treat construction draw and inspection charges as disclosed loan costs.

    During construction, I commonly make interest-only payments on the amount already drawn, not the entire approved balance. My payment generally rises as the lender releases more funds.

    How Can I Control Hidden Construction Risks?

    I would keep a 10% to 20% cash contingency fund, depending on project complexity and lender requirements. It can absorb material price increases, site problems, change orders, permit delays, and expenses the loan excludes.

    I would also plan a detailed final walkthrough and learn how to document construction defects before closing so unfinished work, damaged materials, faulty systems, and disputed repairs are recorded before the permanent loan begins or final funds are released.

    Subcontractor liens also require attention. If a builder receives a draw but fails to pay a subcontractor or supplier, that party may have lien rights under state law. I would require appropriate conditional and final lien waivers before major payments.

    I should also confirm that zoning approvals, building permits, septic authorization, utility plans, and flood requirements remain valid. Expired approvals can delay draws, interrupt construction, and create loan-extension costs.

    What Should I Ask a US Construction Lender?

    What Should I Ask a US Construction Lender?

    I would ask how the lender values my land, whether it uses the purchase price or current appraised value, and whether an ownership or seasoning period applies.

    I would also compare LTV and LTC limits, reserve requirements, draw fees, inspection timing, builder standards, lien-waiver procedures, change-order policies, rate locks, extension charges, and permanent-loan conversion conditions.

    The lowest advertised rate may not create the lowest total cost. Reliable draws, clear documents, and realistic deadlines may prevent expensive construction delays.

    Frequently Asked Questions 

    1. Can a construction loan when you already own the land require no cash down?

    Yes. Accepted land equity may cover the down payment, but I may still need cash for closing costs, reserves, prepaid interest, upgrades, and budget overruns.

    2. Do I Pay Interest on the Full Approved Loan?

    Usually not during construction. I generally pay interest only on funds already released through the draw process.

    3. Does the Lender Take Ownership of My Land?

    No, but the lender normally records a lien against the land and improvements. Default could place both the lot and unfinished home at risk.

    4. Can I Serve as My Own General Contractor?

    Some owner-builder loan programs exist, but many lenders require a licensed, insured, and experienced contractor.

    Final Thoughts

    My lot equity may replace a substantial cash down payment, but land ownership does not remove construction risk. I still need a realistic budget, approved builder, valid permits, dependable draw process, and adequate reserves.

    By comparing several US lenders and reviewing every fee, rate-lock, lien, draw, and conversion rule, I can use my land strategically without overlooking the financial risks.

  • Real Estate Market Insights for Long-Term Investors in a Changing Housing Market

    Real Estate Market Insights for Long-Term Investors in a Changing Housing Market

    A few years ago, I noticed almost every real estate conversation sounded the same. People were chasing the next hot market, hoping prices would keep climbing, and treating every property like a guaranteed win. Watching the market today feels very different. The excitement hasn’t disappeared, but the questions have changed. Instead of asking how fast a home’s value might increase, I’m hearing more people ask whether the numbers actually make sense.

    I’ve also realized that slower markets often reveal more than booming ones. When homes don’t sell overnight, and buyers have time to think, the strongest investment decisions usually come from patience instead of pressure. That’s exactly why real estate market insights for long-term investors matter so much right now. They help separate lasting opportunities from short-term noise.

    Why Today’s Housing Market Looks Different

    Why Today's Housing Market Looks Different

    The housing market isn’t experiencing the dramatic swings many people expected. Instead, it’s settling into a period of slower price growth, elevated borrowing costs, and improving inventory. Home values are still rising in many areas, but at a much steadier pace than during the rapid appreciation seen a few years ago.

    Mortgage rates remain relatively high, making monthly payments more expensive for many buyers. At the same time, more homes are reaching the market, giving buyers greater negotiating power and reducing the urgency that once defined residential real estate.

    For long-term investors, this shift creates a different kind of opportunity. Success depends less on timing the market and more on choosing properties that continue to perform over many years.

    Cash Flow Is Becoming the Priority

    One of the biggest changes among experienced investors is the growing focus on reliable rental income.

    Instead of assuming property values will quickly increase, investors are asking practical questions. Will the rent comfortably cover expenses? Can the property remain profitable if interest rates stay elevated? Does the neighborhood continue attracting new residents?

    These questions lead to more disciplined investment decisions. Properties with healthy cash flow often provide stability even when appreciation slows, making them attractive for investors planning to hold assets over the long term.

    Rising Inventory Is Changing Buyer Opportunities

    Rising Inventory Is Changing Buyer Opportunities

    For years, limited housing supply made it difficult to negotiate. Multiple offers and waived contingencies became common in many markets.

    Today’s conditions are gradually shifting. Higher inventory gives buyers more choices, allowing them to compare neighborhoods, negotiate pricing, and complete proper inspections before making an offer.

    Understanding how inventory levels affect home prices also helps investors recognize when markets are becoming more balanced. More available homes don’t automatically mean falling prices, but they often reduce upward pressure and create better opportunities for thoughtful buyers.

    Regional Growth Still Matters

    Not every market follows the same pattern. Population growth, employment opportunities, infrastructure projects, and local housing demand continue to influence long-term performance.

    Many investors remain interested in fast-growing metropolitan areas across the South because they continue attracting new residents and businesses. However, successful investing isn’t simply about following migration trends. Local job markets, rental demand, school districts, and future development plans often matter just as much as headline statistics.

    Looking beyond national averages allows investors to identify markets where long-term fundamentals remain strong.

    Smaller Investors Are Finding More Opportunities

    Smaller Investors Are Finding More Opportunities

    Large institutional buyers dominated many housing markets during recent years, but the landscape is beginning to change.

    As some major investment firms reduce acquisitions, independent investors have found more opportunities to compete for single-family homes and small rental properties. This creates room for individuals who carefully evaluate deals instead of relying on aggressive bidding strategies.

    That doesn’t mean every property represents a good investment. Careful research, conservative financial planning, and realistic income projections remain essential.

    Long-Term Thinking Beats Short-Term Predictions

    Trying to predict exactly where housing prices will move next year is extremely difficult. Economic conditions, borrowing costs, inflation, and local supply can all influence market performance.

    Long-term investors often achieve better results by concentrating on factors they can evaluate today:

    • Strong rental demand
    • Sustainable cash flow
    • Quality neighborhood fundamentals
    • Property condition and maintenance costs
    • Long-term population and employment growth

    These fundamentals remain valuable regardless of short-term market headlines.

    What Smart Investors Are Watching Next

    What Smart Investors Are Watching Next

    Several trends continue shaping today’s real estate market.

    Mortgage rates remain one of the biggest factors influencing affordability. Inventory levels deserve equal attention because they affect buyer competition and pricing flexibility. Rental demand, local employment growth, and new housing construction also provide valuable insight into where markets may remain resilient over the coming years.

    Rather than reacting to every monthly headline, experienced investors build decisions around long-term fundamentals that support stable returns.

    FAQs: Real Estate Market Insights for Long-Term Investors in a Changing Housing Market

    1. Is now a good time for long-term real estate investing?
    It can be, provided the property offers solid cash flow, realistic purchase pricing, and strong local demand. Long-term success depends more on fundamentals than perfect timing.

    2. Why are investors focusing on cash flow?
    Higher borrowing costs make consistent rental income more valuable. Positive cash flow helps offset expenses while reducing dependence on rapid home appreciation.

    3. Does rising inventory mean home prices will fall?
    Not always. Higher inventory usually creates more negotiating opportunities, but local demand, employment, and housing supply continue influencing prices differently across markets.

    4. Which markets deserve the most attention?
    Areas with population growth, expanding job opportunities, healthy rental demand, and balanced housing supply often provide stronger long-term investment potential.

    Looking Beyond the Next Market Cycle

    The best investment decisions rarely come from chasing headlines or hoping for perfect timing. They come from understanding local markets, evaluating properties carefully, and staying focused on goals that extend well beyond the next year. That’s why today’s slower housing market may actually reward patient investors more than the fast-moving markets of the past.

    Markets will continue changing, but disciplined decisions built on strong fundamentals often stand the test of time.

  • Secret Hacks on How to Convert Garage Into Living Space Cheap!

    Secret Hacks on How to Convert Garage Into Living Space Cheap!

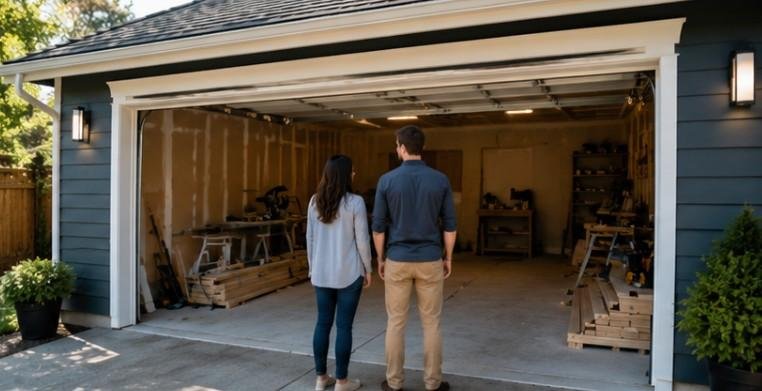
    Staring at piles of forgotten holiday decorations and rusted garden tools made us realize our dusty parking bay held massive potential. Learning how to convert garage into living space gave our home a completely fresh lease on life without requiring a costly room addition.

    Transforming cold concrete into a warm, stylish living environment is one of the smartest ways to expand your floor plan. You maximize unused square footage, increase home equity, and stay entirely within your property footprint.

    Key Takeaways

    1. Checking local zoning codes prevents costly project stops and city fines.
    2. Building proper subfloors seals moisture and flattens sloped concrete slabs.
    3. High performance insulation maintains comfortable indoor temperatures year round.
    4. Independent mini split HVAC systems deliver efficient climate control easily.
    5. Converting your garage creates custom usable space while building valuable equity.

    Navigating Local Regulations and Project Budgets

    Every successful residential transformation requires solid administrative grounding before demolition begins.

    Checking Zoning Codes and Local Permits

    Before swinging a hammer, consult your municipal building department to learn local zoning rules. City building codes establish strict guidelines regarding off-street parking requirements, ceiling heights, and residential setback distances. Securing an official building permit keeps your project fully compliant and ensures hassle-free home resale later.

    Choosing Your Project Scope and Design Tier

    Your target budget dictates the scale of your structural transformation. A simple office or workout studio stays light on the wallet ($5,000 to $12,000). Crafting a fully habitable bedroom with emergency egress windows ($15,000 to $35,000) or a independent accessory dwelling unit ($50,000 to $90,000+) requires deeper investment for plumbing and custom layouts.

    Executing Structural and Surface Upgrades

    Converting industrial concrete into a snug living room requires deliberate floor, wall, and exterior framing upgrades. Before you begin, chalk out what order you want to remodel the garage.

    Leveling Sloped Floors and Moisture Sealing

    Garage concrete slabs are pitched downward toward the driveway for drainage and sit below your main home floor. Applying a heavy vapor barrier prevents ground dampness from ruining finished materials. Framing a wooden subfloor over sleeper joists levels the surface, matches existing home floor heights, and provides a cozy layer of subfloor insulation.

    Insulating Walls and Ceiling Structure

    Insulating Walls and Ceiling Structure

    Bare garage walls lack thermal protection against seasonal temperature swings. Strip old drywall or build interior stud frames to fit high performance fiberglass batts, dense rockwool, or spray foam insulation. Proper thermal barriers wrap your new room tightly, slashing future monthly energy bills while blocking outdoor traffic noise.

    Sealing and Framing the Garage Door Opening

    Eliminating the mechanical garage door tracks is a pivotal step in making the area feel like a true home interior. You can remove the door entirely and frame a new exterior wall matching your home siding, complete with double pane windows. Alternatively, build an insulated interior stud wall directly behind a fixed garage door for a seamless exterior look.

    Installing Essential Utilities and Interior Finishes

    Bringing modern power, plumbing, and aesthetic finishes inside turns a raw utility bay into a polished residential oasis.

    Insulating Walls and Ceiling Structure

    Setting Up Climate Control Systems

    Connecting a newly converted room to your home central HVAC system can overload your existing furnace or compressor. Installing an independent ductless mini split heat pump system delivers quiet, hyper efficient heating and cooling without invasive ductwork. Mini splits allow custom temperature control tuned specifically to your new layout.

    Wiring Power and Running Plumbing Lines

    Garages rarely offer enough electrical outlets to satisfy residential building code requirements. Hire a licensed electrician to install hardwired LED ceiling lights, low voltage switches, and dedicated outlet circuits. If your layout features a kitchenette or bathroom, trenching the concrete floor for water supply and waste lines must happen prior to pouring new underlayment.

    Adding Drywall and Stylish Surface Finishes

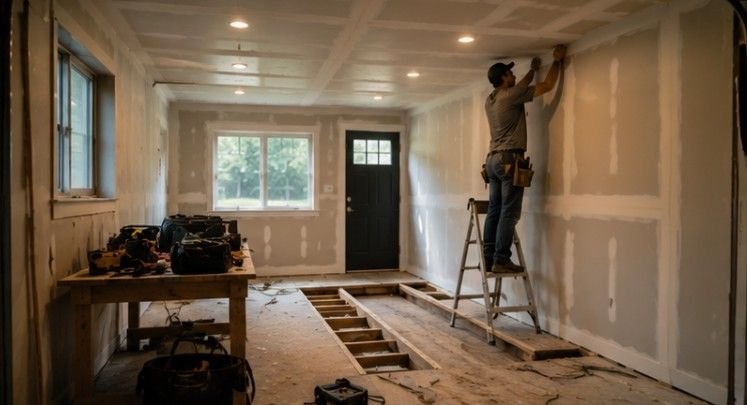
    Hanging half inch drywall instantly transforms rough wooden framing into clean, modern room boundaries. Tape, mud, sand, and prime the walls before applying your favorite paint colors. Finish the room with moisture resistant luxury vinyl plank or laminate flooring, tall baseboards, and decorative trim for a high end architectural aesthetic.

    How to Convert Garage Into Living Space: Step-By-Step

    Mastering how to convert garage into living space requires following a logical construction sequence to avoid expensive re-work.

    How to Convert Garage Into Living Space Step-By-Step

    First, draft a complete floor plan layout and secure all necessary municipal building permits. Clear out all stored items, strip existing wallboards, and inspect the structural framing and roof trusses for damage.

    Second, seal the raw concrete slab with a vapor barrier and build a level subfloor frame. Run rough electrical cabling, internet lines, and plumbing pipes through wall studs and floor cavities.

    Third, seal the garage door opening with insulated framing and install energy efficient windows. Stuff wall cavities with insulation, hang drywall, mud surfaces smooth, and install your mini split HVAC system before laying down finished flooring and baseboards.

    Frequently Asked Questions 

    1. How much does it cost to convert a garage to live in?

    Converting a garage into a livable room generally costs between $5,000 and $35,000 for standard spaces. Expanding the scope to include an accessory dwelling unit with full plumbing, kitchen appliances, and private entryways can exceed $50,000.

    2. What is the cheapest way to convert a garage into living space?

    The most affordable method involves maintaining an open floor plan while utilizing existing electrical circuits. Using budget friendly materials like luxury vinyl plank flooring, surface mounted insulation panels, and plug in heating units keeps overall project expenses low.

    3. How much would it cost to convert a garage to a living room?

    Transforming a typical two car garage into a comfortable family living room usually ranges from $15,000 to $25,000. This pricing covers structural subfloor leveling, wall insulation, drywall finishing, electrical outlets, recessed lighting, and a ductless mini split AC unit.

    4. Is it worth converting a garage into living space?

    Yes, converting your garage offers an impressive return on investment by expanding functional square footage without high construction overhead. It increases usable living area for growing families and frequently recovers a large portion of its cost in added home equity.

    Unleash Your Home Potential With a Garage Makeover!

    Discovering how to convert garage into living space gives you the power to unlock valuable square footage sitting right behind your driveway. By securing local permits, leveling sloped concrete, insulating wall cavities, and installing independent climate control, you create an amazing destination room. Grab your tape measure, start planning your ideal layout, and transform that dusty vehicle bay into your household’s favorite new hangout today!

  • Document Construction Defects Before Closing: A Buyer’s Guide

    Document Construction Defects Before Closing: A Buyer’s Guide

    Buying a new home should feel exciting, but the final walkthrough is my best chance to protect my investment. After closing, unresolved repairs may become harder to negotiate. When I understand how to document construction defects before closing, I create proof of what was wrong, when I found it, what repair I requested, and whether the builder completed it.

    Because US contracts and remedies vary by state, I review my agreement early. The Consumer Financial Protection Bureau recommends scheduling a home inspection and reviewing documents before closing, while HUD encourages buyers to obtain a private inspection.

    What Construction Defects Should I Record?

    I document unfinished work, damaged materials, poor workmanship, unsafe installations, and anything that differs from the plans, finish selections, change orders, or contract. I group defects as cosmetic, workmanship, material, or structural and systemic.

    Paint drips are cosmetic, misaligned tile shows poor workmanship, and cracked glass involves materials. Foundation movement, drainage problems, roof leaks, faulty wiring, plumbing failures, and an HVAC system that does not cool require faster attention.

    Whenever my contract allows, I inspect at several stages. A pre-drywall inspection can reveal concerns involving framing, plumbing, electrical wiring, HVAC, insulation, roofing, and wall systems before workers cover them. Near completion, I schedule an independent inspection, attend the blue tape walkthrough, and complete a final walkthrough to confirm repairs.

    How Do I Create a Detailed New Construction Punch List?

    How Do I Create a Detailed New Construction Punch List?

    A punch list, also called a snag list, becomes my master record of defective or incomplete work.

    Careful inspections have become an increasingly important part of modern home buying habits, especially when buyers want clear evidence that a newly built property matches the agreed plans, finishes, and quality standards.

    I inspect every room clockwise from the doorway, checking ceilings, walls, windows, doors, outlets, fixtures, cabinets, floors, baseboards, and appliances. I also examine the garage, exterior, grading, and drainage.

    I assign every defect a unique number. My log records the room, exact location, discovery date, category, severity, photo or video name, contract reference, requested correction, responsible party, deadline, and status.

    Specific language matters. Instead of “broken wall,” I write, “Four-inch horizontal gouge on the primary bedroom’s west wall, 12 inches above the baseboard.” I place low-tack blue painter’s tape beside the problem so crews can find it, but I never rely on tape alone.

    How Should I Photograph and Film Construction Defects?

    My process for how to document construction defects before closing follows the same sequence for every item. I photograph the whole room first, take a medium-distance image, and then capture close-ups from several angles to show depth, shadow, gaps, or surface damage.

    I place a ruler or tape measure beside cracks and gaps to show size. I confirm that my phone displays the correct date and time and may enable location data. Metadata can support my record, but I still keep written notes because metadata can be altered or removed.

    I use video for a sticking door, rattling HVAC unit, slow drain, plumbing leak, flickering light, loose railing, or malfunctioning appliance. I state the date, room, and defect number. I save original files in cloud storage and a separate local backup.

    Why Do I Need an Independent Inspector and Written Record?

    Why Do I Need an Independent Inspector and Written Record?

    I do not rely only on a municipal inspection or the builder’s quality-control team. I hire a licensed independent home inspector. For a serious structural concern, I may also consult a structural engineer.

    The signed report provides professional findings on major systems. I attach the relevant report page to the matching punch-list item.

    I centralize communication in a spreadsheet and follow every conversation with a short email summary. I require written confirmation of accepted and disputed items, who will complete each repair, and the promised date. If the builder uses a portal, I save screenshots showing submissions and status changes.

    I also compare installed materials, fixtures, appliances, and finishes with the purchase contract, plans, selection sheets, specifications, and approved change orders. Referencing the correct document helps show exactly what the builder agreed to provide.

    What If Repairs Are Not Finished Before Closing?

    I never close based solely on a verbal promise that the builder will “fix it next week.” I review the purchase agreement, inspection contingency, warranty, lender requirements, and state notice rules with my real estate agent and, when needed, a licensed real estate attorney.

    Property-related disagreements can become more complicated after ownership transfers, just as buyers may need legal guidance when determining can a neighbor claim land through adverse possession or resolving other disputes involving property rights.

    Depending on the contract, lender, and state law, options may include delaying closing, negotiating a repair credit, signing a post-closing repair agreement, or establishing an escrow holdback. NAHB (The National Association of Home Builders) contract materials recognize retainage for punch-list completion as an optional approach, but it is not automatically available in every transaction.

    When an escrow holdback is appropriate, I ask an attorney to draft or review it. The agreement should identify each defect, the amount held, repair standard, deadline, access terms, inspection procedure, release conditions, and consequences of nonperformance.

    A financial holdback can preserve leverage because the builder does not receive the retained amount until the specified work is completed and approved. However, the buyer, builder, lender, title company, and closing agent may all need to accept the arrangement.

    How Do I Verify Repairs and Protect My Warranty Rights?

    How Do I Verify Repairs and Protect My Warranty Rights?

    I do not mark an item complete simply because the builder’s portal says “closed.” I return with the original punch list, retest the component, inspect the repair, and take after-repair photos under the same defect number. For structural, roofing, moisture, electrical, plumbing, or HVAC concerns, I may order a reinspection.

    I also read the builder warranty before closing. The Federal Trade Commission notes that new-home warranties may have different coverage periods, exclusions, and dispute procedures, and recommends keeping records of builder and warranty communications.

    A warranty does not replace proper pre-closing documentation. I follow the required claim procedure, meet every notice deadline, keep proof of submission, and save all responses from the builder or warranty administrator.

    Frequently Asked Questions 

    1. Is a Blue Tape Walkthrough the Same as a Home Inspection?

    No. A blue tape walkthrough focuses on visible finishes and incomplete work, while an independent inspection evaluates major systems and construction conditions.

    2. Should I Photograph Minor Cosmetic Defects?

    Yes. I photograph scratches, dents, paint flaws, chipped surfaces, and damaged finishes before moving in because proving when they occurred may become harder later.

    3. Can a Builder Repair Punch-List Items After Closing?

    Yes, when the contract permits it, but I require a written agreement with repair deadlines, access arrangements, verification requirements, and a defined remedy for nonperformance.

    4. Can I Delay Closing Because of Construction Defects?

    Possibly. It depends on the contract, lender, defect severity, and state law. I review my options with my real estate agent and attorney before refusing to close.

    Final Takeaway

    The safest answer to how to document construction defects before closing combines a precise punch list, context and close-up photos, functional videos, an independent inspection report, written repair deadlines, and a final reinspection. I protect my leverage by resolving major concerns before funds transfer.

  • How Smart Home Market Trends Are Influencing Modern Home Design

    How Smart Home Market Trends Are Influencing Modern Home Design

    I remember walking into a newly built home a few months ago, expecting to see smart speakers sitting on shelves and control panels covering the walls. Instead, nothing looked particularly high-tech. The lighting adjusted quietly as I moved from one room to another, the temperature felt comfortable without anyone touching a thermostat, and even the window shades responded automatically as the afternoon sun shifted. That experience completely changed the way I looked at modern home design.

    It made me realize that today’s smartest homes aren’t trying to show off technology. They’re designed so the technology almost disappears. That’s exactly why smart home market trends have become one of the biggest influences on residential design in 2026. Builders and homeowners are no longer adding gadgets after construction. They’re planning homes around connected living from the very beginning.

    Why Smart Homes Are Changing the Way Houses Are Designed

    Why Smart Homes Are Changing the Way Houses Are Designed

    Modern homes are becoming more responsive because people expect them to work around their daily routines. Convenience still matters, but buyers are also thinking about energy efficiency, comfort, security, and long-term value.

    Instead of filling rooms with visible devices, architects are designing spaces where technology blends into the background. That shift has changed everything from floor plans and electrical layouts to storage spaces and ventilation systems. Smart home technology is now influencing the structure of a home just as much as its appearance.

    Invisible Technology Is Becoming the New Standard

    One of the biggest smart home market trends is making technology almost impossible to notice.

    Built-in speakers, hidden charging stations, concealed cameras, and flush-mounted sensors help maintain clean interior lines without sacrificing functionality. This approach supports the minimalist style that many homeowners already prefer while reducing visual clutter.

    Architects are also working closely with technology specialists much earlier in the design process. Instead of drilling through finished walls to install smart devices later, wiring, networking, and ventilation are planned before construction begins. The result is a home that feels organized rather than overloaded with electronics.

    Smart Energy Systems Are Reshaping Home Layouts

    Smart Energy Systems Are Reshaping Home Layouts

    Energy management has become a major design priority.

    AI-powered smart thermostats learn household routines and automatically adjust heating or cooling throughout the day. Rather than running constantly, these systems help reduce unnecessary energy use while maintaining consistent comfort.

    Many newly designed homes also include dedicated utility areas for solar equipment, battery storage, and smart electrical panels. Appliances can communicate with energy management systems, allowing dishwashers, washing machines, and electric vehicle chargers to operate during lower-cost electricity hours.

    These features don’t just lower utility bills. They also make homes more attractive to buyers who value efficiency and sustainability.

    Wellness Is Becoming Part of Home Design

    Homeowners are paying closer attention to how their living spaces affect everyday well-being.

    Circadian lighting has become one of the most interesting innovations. Instead of producing the same brightness all day, smart LED lighting changes color temperature to better match natural daylight. Brighter, cooler tones help support focus during the day, while warmer lighting creates a more relaxing atmosphere in the evening.

    Indoor air quality is receiving similar attention. Hidden air quality sensors continuously monitor humidity, airborne particles, and pollutants. When needed, connected ventilation or purification systems automatically respond without requiring homeowner intervention.

    Rather than treating wellness as an extra feature, modern homes are beginning to support healthier living through everyday design.

    Security Is Becoming Smarter Without Looking Different

    Security Is Becoming Smarter Without Looking Different

    Security systems have evolved well beyond traditional alarms.

    Biometric door locks, AI-assisted security cameras, motion sensors, and connected entry systems now work together as part of a unified ecosystem. Many homeowners can verify deliveries, unlock doors remotely, or receive instant notifications through a single application.

    Universal connectivity standards like Matter are also making smart homes easier to manage. Instead of juggling multiple control systems from different manufacturers, homeowners can connect compatible devices into one seamless platform.

    The technology becomes more useful because it becomes simpler to use.

    Buyers Are Thinking Beyond Convenience

    Smart home upgrades are no longer viewed as luxury additions. Many buyers now consider them practical investments that improve comfort, reduce operating costs, and support future resale value.

    Builders have noticed this shift as well. Features such as automated lighting, connected climate control, and integrated security systems are increasingly appearing in standard construction instead of premium upgrade packages.

    For buyers researching long-term property investment opportunities, homes with thoughtfully integrated smart technology often stand out because they’re designed for changing lifestyles rather than short-term trends.

    Designing Homes That Can Adapt to the Future

    Designing Homes That Can Adapt to the Future

    Technology changes quickly, but good home design should last for decades.

    That’s why flexibility has become just as important as innovation. Designers are creating homes with adaptable wiring infrastructure, expandable networking systems, and layouts that can support future devices without requiring major renovations.

    This forward-thinking approach allows homeowners to adopt new technology as it evolves while protecting the home’s functionality and long-term value.

    FAQs: How Smart Home Market Trends Are Influencing Modern Home Design

    1. What are the biggest smart home market trends in 2026?
    Hidden technology, AI-powered energy management, wellness-focused design, smart security, and connected ecosystems are leading the market.

    2. Do smart home features increase property value?
    Well-designed smart features can improve buyer appeal by offering better energy efficiency, convenience, security, and long-term functionality.

    3. Why are architects planning smart technology earlier?
    Planning during construction allows wiring, sensors, ventilation, and automation systems to integrate neatly without disrupting the home’s design.

    4. What is Matter, and why is it important?
    Matter is a universal smart home standard that allows compatible devices from different brands to work together, making connected homes simpler to manage.

    The Best Smart Homes Don’t Feel Complicated

    The most successful smart homes aren’t filled with gadgets competing for attention. They’re designed to quietly improve everyday living without changing how people naturally use their spaces. When technology supports comfort, efficiency, wellness, and security behind the scenes, it becomes part of the home instead of becoming its main feature.

    That quiet integration is what will continue shaping modern home design long after today’s newest devices are replaced.