Category: Renovation

  • Renovation Tasks You Should Not DIY (Save Your Equity!)

    Renovation Tasks You Should Not DIY (Save Your Equity!)

    Staring at a sledgehammer after watching weekend home improvement shows makes tackling big renovation tasks you should not DIY look deceptively simple. Our remodeling crew has spent years correcting well-meaning homeowner blunders, and we know how quickly a simple project spiraling out of control can ruin your home value. 

    While swapping cabinet knobs or painting a bedroom builds confidence, crossing into heavy structural, high voltage, or chemical upgrades creates massive safety liabilities. Knowing your actual skill boundaries keeps your family safe and saves tens of thousands of dollars in emergency contractor repair bills.

    Electrical and Gas Work

    High voltage power and flammable fuel lines require specialized tools, precise calculations, and master licensing to prevent tragic accidents.

    Main Panel Upgrades

    Handling main breaker feeds presents extreme arc flash risks and lethal electrical shock.

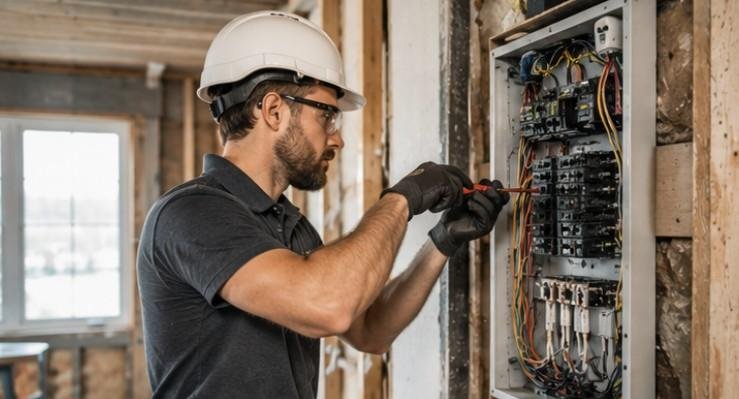
    Upgrading your electrical panel to handle modern power demands requires working directly with unmetered utility feeds. High voltage risks severe shocks or death, making this a task strictly for master electricians who follow strict municipal safety codes. A single slipped screwdriver can trigger a massive electrical arc that ruins your service line and causes fatal injuries.

    Licensed contractors coordinate directly with local power companies to shut off main service before installing fresh breaker boxes. They balance household electrical loads to ensure your modern appliances run efficiently without overloading circuits or tripping breakers constantly.

    New Wiring and Circuits

    Adding fresh electrical branches without proper load math creates hidden fire traps inside your walls.

    Running fresh wiring through studs seems straightforward until incorrect wire loads cause electrical fires inside hidden wall cavities. Overloading a circuit breaker or choosing thin wire gauges causes conductors to overheat silently behind dry wall. The The Spruce home improvement guide notes that faulty wiring remains a top cause of preventable house fires across the country.

    Certified electricians calculate total circuit capacity and install correct arc fault breakers to protect your household. They ensure every junction box is fully grounded and sealed against short circuits, giving you total peace of mind for decades.

    Gas Line Changes

    Altering fuel pipes requires precision threading and specialized pressure testing to prevent catastrophic gas buildup.

    Extending a gas pipe for a gourmet kitchen stove or patio grill requires specialized threading compounds and calibrated pressure gauges. Tiny leaks from bad seals trigger explosions when trapped gas accumulates inside unventilated home spaces. Home inspectors at Nashville TN Home Inspections emphasize that gas line errors are among the most dangerous defects found during home sales.

    Professional plumbers perform rigorous pressure drop tests to confirm every joint is completely airtight before restoring fuel flow. Relying on certified gas technicians protects your neighborhood and ensures your installation passes municipal safety inspections cleanly.

    Plumbing and Water Systems

    Water flows under constant pressure, meaning small piping blunders quickly turn into massive structural rot and biohazards. At times, these renovations might also require permits.

    Plumbing and Water Systems

    Behind The Wall Pipes

    Concealed water leaks slowly destroy wood framing and create expensive environmental health problems.

    Installing supply lines inside wall cavities requires flawless soldering and press-fitting skills to handle continuous municipal water pressure. Hidden leaks rot floor joists and grow toxic mold behind your drywall long before visible stains appear on your ceiling. Real estate experts at M/I Homes warn that structural moisture damage dramatically reduces home appraisal values during resale.

    Master plumbers use specialized pressure testing equipment to verify that new supply lines hold strong under peak household demand. Investing in professional pipe installation prevents sudden line bursts that ruin finished basements and destroy personal belongings.

    Main Sewer Lines

    Discharge piping relies on exact gravity pitching to carry waste away without backing up into your living areas.

    Connecting new bathroom fixtures to your main drain stack requires precise pitch calculations and specialized heavy duty pipe fittings. Improper slopes back up waste into the home, flooding your floors with hazardous sewage that requires expensive professional cleanup. A pitch that is too steep leaves solids behind, while a pitch that is too flat stops wastewater from moving altogether.

    Licensed drainage experts use specialized video scope cameras to inspect the internal condition and alignment of your waste pipes. They guarantee that every drain line meets exact slope standards, keeping your plumbing system flowing smoothly without foul odors or backup risks.

    Structural and Exterior Elements

    Modifying load bearing framing, high roofs, or hazardous materials carries high injury risks and structural failure hazards.

    Structural and Exterior Elements

    Removing Load Bearing Walls

    Tearing out structural interior walls without temporary support beams compromises the integrity of your whole roof.

    Open floor plans are visually appealing, but cutting wrong supports makes ceilings cave in and distorts your entire home frame. Structural guidance from Southern Living shows that removing support studs without proper temporary headers causes severe ceiling sagging and cracked finishes. Professional builders calculate live weight loads and install custom steel or engineered LVL beams according to strict local building codes.

    Contractors secure temporary support walls before removing any original studs, ensuring the structural weight transfers safely. Their precision work prevents foundation shifting, wall cracking, and structural collapse, keeping your family completely safe during major layouts.

    Roof Replacement

    Working on steep roof pitches exposes you to fall risks while requiring precise flashing techniques to stop leaks.

    Replacing worn roofing shingles requires physical endurance, specialized harnesses, and exact underlayment layering to shed driving rain. High falls lead to grave injuries, making steep elevation repairs one of the most hazardous home maintenance jobs. Professional roofers bring safety equipment, steep pitch gear, and weatherproofing skill to every job site.

    Experienced crews strip old materials down to the plywood deck, replacing rotted wood and installing ice shields along roof valleys. Their detailed work prevents subtle water intrusion that rots rafters and damages insulation, protecting your interior ceilings for decades.

    Asbestos Removal

    Asbestos Removal

    Disturbing old insulation or floor tiles releases microscopic mineral fibers that pose severe respiratory health risks.

    Homes built before the 1980s often contain hazardous asbestos inside duct insulation, pop-corn ceiling textures, or vinyl floor tiles. Breathing fibers causes permanent lung damage and chronic respiratory illnesses that develop quietly over several decades. Attempting to scrape or tear out these materials without containment scatters dangerous dust throughout your home HVAC system.

    Certified environmental abatement technicians seal off work areas with negative air pressure machines and wear specialized respirator protection. They dispose of dangerous waste according to strict federal regulations, ensuring your living space remains clean, healthy, and hazard free.

    Mastering Your Project Scope: Renovation Tasks You Should Not DIY

    Following a clear evaluation process keeps your home improvement project safe, legal, and within budget.

    Start by evaluating your planned renovation against strict trade safety boundaries before buying tools or demolition equipment. Identify whether your project touches main electrical panels, fuel gas connections, load bearing walls, or hidden supply plumbing. If any of these high risk systems are involved, stop immediately and request detailed proposals from three licensed trade contractors.

    Next, contact your local municipal building department to check permit requirements and home inspection steps for your area. Confirm that your hired tradespeople carry active general liability and worker compensation insurance policies. Securing qualified professionals early prevents expensive project stalls, protects your home equity, and ensures complete building code compliance.

    Frequently Asked Questions

    1. What home improvement projects should I avoid doing myself? 

    You should avoid structural wall removals, main electrical panel upgrades, gas line modifications, roof replacements, and main sewer line work. These complex tasks carry extreme life safety hazards, severe property damage risks, and costly building code violations.

    2. What is the 30% rule for renovations? 

    The 30% rule suggests limiting your total renovation expenditure to 30% of your property’s current total market value. Furthermore, smart homeowners set aside an extra 20% to 30% contingency fund to cover unexpected structural or mechanical repairs.

    3. What are common renovation mistakes to avoid? 

    Common mistakes include skipping required building permits, hiring uninsured workers, ignoring contingency budgets, and attempting dangerous trade tasks without licensing. These blunders lead to denied insurance claims, structural defects, and severe financial losses during resale.

    4. What should you not DIY? 

    You should not DIY high voltage wiring, gas line extensions, load bearing wall removals, asbestos abatement, or slab plumbing repairs. Hiring licensed, bonded, and insured professionals protects your physical safety and preserves your long term home equity.

    Put Down the Sledgehammer

    Protecting your home investment requires knowing when to put down the tools and call certified professionals for renovation tasks you should not DIY. Partnering with licensed trades safeguards your family’s safety, ensures strict building code compliance, and preserves your equity. Smart homeowners know that paying for professional craftsmanship today prevents catastrophic emergency repairs and maintains full property value for the future.

  • 10 Steps to Decide What Order to Remodel a House

    10 Steps to Decide What Order to Remodel a House

    Building your dream living space quickly turns into a chaotic money pit if you tackle project steps out of sequence. Having managed multi-room transformation projects through every messy phase, experience proves that sticking to a strict construction dependency sequence saves thousands. Figuring out what order to remodel a house isn’t just about personal style; it is about keeping trades working smoothly without destroying previous progress.

    Step 1: Planning, Design, and Securing Permits

    Before swinging a single hammer, establishing a clear structural plan prevents costly change orders down the road.

    Setting Budgets and Material Choices

    Every successful home transformation begins long before construction crews step foot on your property. You need to draft detailed architectural scope documents, establish firm material budgets, and select key fixtures early. Sourcing custom cabinetry, tile, and appliances early prevents project halts while workers wait for delayed shipments.

    Getting Local Building Permits

    Skipping municipal building permits might feel like a clever shortcut, but unpermitted structural or electrical alterations cause major issues later. City inspectors ensure your wiring, plumbing shifts, and load-bearing beam modifications meet safety codes. Securing official permits protects your home value and guarantees smooth transactions when you eventually sell.

    Step 2: Exterior Repairs and Demolition

    Once plans clear, heavy tear-out work clears away old materials to build a clean baseline for construction.

    Fixing Roofs and Sealing Exterior

    Never invest in high-end interior finishes until your exterior building envelope remains completely airtight and watertight. Repairing sagging roof rafters, replacing leaking skylights, and sealing foundation walls happen right here. Securing windows and doors keeps indoor construction zones protected against weather damage during upcoming wall installations.

    Controlled Interior Tear-Out

    Heavy demolition removes outdated fixtures, custom cabinets, and unwanted interior partition walls to prepare the space. Demolition clears out worn subflooring and exposes the bare structural bones of your residence. Staging dumpsters on-site handles heavy debris, keeping pathways clear so subcontractors can safely move equipment inside.

    Step 3: Framing and Structural Modifications

    With the house opened up, carpenters step in to build the functional structural backbone of your living area.

    Step 3 Framing and Structural Modifications

    Building Walls and Support Beams

    Framing crews construct new room layouts, alter interior doorway headers, and reinforce floor joists to support heavy stone counters. Opening up closed floor plans requires engineered support beams to safely transfer structural loads. This stage establishes the physical footprint for all future cabinetry, plumbing fixtures, and lighting locations.

    Repairing Hidden Framing Issues

    Exposing internal wall bays often reveals past water damage, termite activity, or sagging structural elements that require immediate attention. Carpenter teams sister damaged joists and level uneven subfloors before proceeding to interior trade work. Resolving structural issues now prevents sloping floors and cracked drywall after your project finishes.

    Step 4: Rough-In Mechanical Systems

    Closing up open wall bays turns a chaotic, dusty jobsite into an actual recognizable living area.

    Running MEP Utilities in Open Walls

    Contractors follow a strict order during system rough-ins: bulky HVAC ductwork goes in first, followed by sloped plumbing drain lines, and flexible electrical wiring last. Routing electrical wires around rigid plumbing pipes prevents accidental trade conflicts behind enclosed spaces. Installing these core utilities while studs remain bare ensures fast, efficient runs.

    Passing Municipal Rough Inspections

    Once all mechanical runs are positioned, city building inspectors review the open framing to approve safety code compliance. Inspectors check wire gauges, plumbing pressure, and duct placement before anything gets covered up. Passing this official review gives you green light approval to insulate and seal wall cavities.

    Step 5: Insulation and Drywall Installation

    Adding insulation and hanging wallboards transforms bare framing into defined, comfortable room spaces.

    Fitting Wall and Ceiling Insulation

    Proper thermal insulation gets fitted snugly into open wall cavities, crawlspaces, and ceiling joists. Spray foam or mineral wool batts deliver essential soundproofing and energy efficiency throughout living areas. Sealing these spaces creates a comfortable indoor climate and lowers monthly utility heating costs.

    Hanging, Taping, and Mudding Drywall

    Drywall crews lift, screw, tape, and coat gypsum boards across all exposed interior walls and ceiling planes. Multiple thin coats of joint compound are applied, followed by extensive sanding to achieve seamless surfaces. Proper drying time between mudding coats prevents future joint cracking when structural temperatures shift across seasons.

    Step 6: Painting and Wall Preparation

    Executing finish materials in the right order preserves your expensive surface choices from accidental damage.

    Step 6 Painting and Wall Preparation

    Painting Ceilings and Wall Priming

    Applying primer and initial paint coats before laying new flooring speeds up work and eliminates stress. Painters work freely using extension poles and ladders without worrying about paint splatter landing on brand-new surfaces. Getting overhead ceiling painting completed early protects low-level finishes from dripping mess.

    Protecting Surfaces Before Floor Work

    Completing major wall painting tasks ahead of finish flooring keeps your construction site organized and clean. Primer seals fresh drywall paper so topcoat paint glies on smoothly with vibrant, even coverage. A simple final touch-up coat happens much later after all heavy cabinet installations finish.

    Step 7: Finish Flooring Installation

    Laying down quality flooring creates a level foundation for all built-in woodworking and trim elements.

    Installing Hardwood, Tile, or Vinyl

    Laying finished flooring across entire rooms before setting base cabinets creates a flat plane and seamless aesthetic. Modern Luxury Vinyl Plank or solid hardwood floors extend wall-to-wall so future appliance replacements slide out effortlessly. Tile work in bathrooms and kitchens gets grouted and sealed before fixture setting.

    Curing and Protecting New Floors

    Newly laid flooring requires proper curing time and protective covering before heavy trades roll in cabinets. Contractors lay heavy builder board paper across wood and tile to prevent scratches from boots or falling tools. Keeping floors covered guarantees your pristine investment stays flawless until move-in day.

    Step 8: Cabinetry and Architectural Trim

    Setting custom woodworking shapes the functionality and character of your newly renovated kitchen and living spaces.

    Mounting Base and Wall Cabinets

    Carpenters anchor heavy kitchen base cabinets directly into wall studs for solid, level countertop support. Precision leveling ensures cabinet boxes sit flush across floor spans without awkward gaps along walls. Setting upper wall cabinets completes the layout framework required for precision countertop measurement.

    Fitting Countertops and Interior Trim

    Fabricators template, cut, and secure durable stone countertops directly over level base cabinet structures. Finish carpenters follow closely behind to install decorative baseboards, door casings, window trim, and crown molding. Sharp trim carpentry covers expansion gaps around flooring and gives rooms a polished appearance.

    Step 9: Final Fixture Trim-Out

    The final transformation stage brings your renovated home to life with working power, running water, and sparkling details.

    Step 9 Final Fixture Trim-Out

    Connecting Electrical and Plumbing Hardware

    Electricians mount designer light fixtures, decorative switch plates, and cover outlets across every room. Plumbers connect sink faucets, garbage disposals, shower heads, and toilets to previously inspected rough piping. Testing every fixture guarantees leak-free operation and smooth electrical performance throughout your home.

    Installing Appliances and Punch List Review

    Heavy kitchen appliances slide into place, hooking directly into designated gas, water, and electrical connections. You conduct a thorough final walkthrough with your general contractor to build a detailed punch list. Fixing minor paint touch-ups and cabinet adjustments marks the official completion of your house remodel.

    Also read: Permits Needed for Your Next Home Renovation

    Frequently Asked Questions

    1. In what order should a house be renovated?

    A house should be renovated by completing planning and permits first, followed by exterior repairs, demolition, framing, utility rough-ins, insulation, drywall, painting, flooring, cabinetry, and final fixture connections. Following this logical sequence prevents damage to completed work and avoids costly contractor delays.

    2. What are the biggest home renovation mistakes?

    The biggest mistakes include skipping municipal permits, changing design plans mid-construction, ordering materials late, failing to set a contingency budget, and installing finish flooring before completing messy drywall sanding or ceiling painting tasks. Avoiding these errors saves thousands of dollars during your remodel.

    3. What is the most expensive part of a house to remodel?

    Kitchens and primary bathrooms represent the most expensive spaces to remodel due to high material costs and skilled labor requirements. Shifting plumbing lines, upgrading electrical panels, buying custom cabinetry, and installing stone countertops quickly drive up overall project expenses per square foot.

    4. What is the 30% rule for renovations?

    The 30% rule states that your total home renovation budget should not exceed 30% of your property’s total market value. Additionally, it recommends holding a 20% to 30% cash buffer within your overall budget to handle unexpected structural or electrical issues uncovered during demolition.

    You Made It to the Finish Line!

    Mastering what order to remodel a house turns a potentially chaotic project into an exciting, structured home improvement success. When you follow logical dependencies—securing the building shell, running mechanical utilities early, and saving finish details for last—you protect your budget every step of the way. Map out your renovation timeline today, partner with trusted trade professionals, and enjoy your beautifully transformed home!

  • Secret Hacks on How to Convert Garage Into Living Space Cheap!

    Secret Hacks on How to Convert Garage Into Living Space Cheap!

    Staring at piles of forgotten holiday decorations and rusted garden tools made us realize our dusty parking bay held massive potential. Learning how to convert garage into living space gave our home a completely fresh lease on life without requiring a costly room addition.

    Transforming cold concrete into a warm, stylish living environment is one of the smartest ways to expand your floor plan. You maximize unused square footage, increase home equity, and stay entirely within your property footprint.

    Key Takeaways

    1. Checking local zoning codes prevents costly project stops and city fines.
    2. Building proper subfloors seals moisture and flattens sloped concrete slabs.
    3. High performance insulation maintains comfortable indoor temperatures year round.
    4. Independent mini split HVAC systems deliver efficient climate control easily.
    5. Converting your garage creates custom usable space while building valuable equity.

    Navigating Local Regulations and Project Budgets

    Every successful residential transformation requires solid administrative grounding before demolition begins.

    Checking Zoning Codes and Local Permits

    Before swinging a hammer, consult your municipal building department to learn local zoning rules. City building codes establish strict guidelines regarding off-street parking requirements, ceiling heights, and residential setback distances. Securing an official building permit keeps your project fully compliant and ensures hassle-free home resale later.

    Choosing Your Project Scope and Design Tier

    Your target budget dictates the scale of your structural transformation. A simple office or workout studio stays light on the wallet ($5,000 to $12,000). Crafting a fully habitable bedroom with emergency egress windows ($15,000 to $35,000) or a independent accessory dwelling unit ($50,000 to $90,000+) requires deeper investment for plumbing and custom layouts.

    Executing Structural and Surface Upgrades

    Converting industrial concrete into a snug living room requires deliberate floor, wall, and exterior framing upgrades. Before you begin, chalk out what order you want to remodel the garage.

    Leveling Sloped Floors and Moisture Sealing

    Garage concrete slabs are pitched downward toward the driveway for drainage and sit below your main home floor. Applying a heavy vapor barrier prevents ground dampness from ruining finished materials. Framing a wooden subfloor over sleeper joists levels the surface, matches existing home floor heights, and provides a cozy layer of subfloor insulation.

    Insulating Walls and Ceiling Structure

    Insulating Walls and Ceiling Structure

    Bare garage walls lack thermal protection against seasonal temperature swings. Strip old drywall or build interior stud frames to fit high performance fiberglass batts, dense rockwool, or spray foam insulation. Proper thermal barriers wrap your new room tightly, slashing future monthly energy bills while blocking outdoor traffic noise.

    Sealing and Framing the Garage Door Opening

    Eliminating the mechanical garage door tracks is a pivotal step in making the area feel like a true home interior. You can remove the door entirely and frame a new exterior wall matching your home siding, complete with double pane windows. Alternatively, build an insulated interior stud wall directly behind a fixed garage door for a seamless exterior look.

    Installing Essential Utilities and Interior Finishes

    Bringing modern power, plumbing, and aesthetic finishes inside turns a raw utility bay into a polished residential oasis.

    Insulating Walls and Ceiling Structure

    Setting Up Climate Control Systems

    Connecting a newly converted room to your home central HVAC system can overload your existing furnace or compressor. Installing an independent ductless mini split heat pump system delivers quiet, hyper efficient heating and cooling without invasive ductwork. Mini splits allow custom temperature control tuned specifically to your new layout.

    Wiring Power and Running Plumbing Lines

    Garages rarely offer enough electrical outlets to satisfy residential building code requirements. Hire a licensed electrician to install hardwired LED ceiling lights, low voltage switches, and dedicated outlet circuits. If your layout features a kitchenette or bathroom, trenching the concrete floor for water supply and waste lines must happen prior to pouring new underlayment.

    Adding Drywall and Stylish Surface Finishes

    Hanging half inch drywall instantly transforms rough wooden framing into clean, modern room boundaries. Tape, mud, sand, and prime the walls before applying your favorite paint colors. Finish the room with moisture resistant luxury vinyl plank or laminate flooring, tall baseboards, and decorative trim for a high end architectural aesthetic.

    How to Convert Garage Into Living Space: Step-By-Step

    Mastering how to convert garage into living space requires following a logical construction sequence to avoid expensive re-work.

    How to Convert Garage Into Living Space Step-By-Step

    First, draft a complete floor plan layout and secure all necessary municipal building permits. Clear out all stored items, strip existing wallboards, and inspect the structural framing and roof trusses for damage.

    Second, seal the raw concrete slab with a vapor barrier and build a level subfloor frame. Run rough electrical cabling, internet lines, and plumbing pipes through wall studs and floor cavities.

    Third, seal the garage door opening with insulated framing and install energy efficient windows. Stuff wall cavities with insulation, hang drywall, mud surfaces smooth, and install your mini split HVAC system before laying down finished flooring and baseboards.

    Frequently Asked Questions 

    1. How much does it cost to convert a garage to live in?

    Converting a garage into a livable room generally costs between $5,000 and $35,000 for standard spaces. Expanding the scope to include an accessory dwelling unit with full plumbing, kitchen appliances, and private entryways can exceed $50,000.

    2. What is the cheapest way to convert a garage into living space?

    The most affordable method involves maintaining an open floor plan while utilizing existing electrical circuits. Using budget friendly materials like luxury vinyl plank flooring, surface mounted insulation panels, and plug in heating units keeps overall project expenses low.

    3. How much would it cost to convert a garage to a living room?

    Transforming a typical two car garage into a comfortable family living room usually ranges from $15,000 to $25,000. This pricing covers structural subfloor leveling, wall insulation, drywall finishing, electrical outlets, recessed lighting, and a ductless mini split AC unit.

    4. Is it worth converting a garage into living space?

    Yes, converting your garage offers an impressive return on investment by expanding functional square footage without high construction overhead. It increases usable living area for growing families and frequently recovers a large portion of its cost in added home equity.

    Unleash Your Home Potential With a Garage Makeover!

    Discovering how to convert garage into living space gives you the power to unlock valuable square footage sitting right behind your driveway. By securing local permits, leveling sloped concrete, insulating wall cavities, and installing independent climate control, you create an amazing destination room. Grab your tape measure, start planning your ideal layout, and transform that dusty vehicle bay into your household’s favorite new hangout today!

  • Best Eco Friendly Home Renovation Materials for Remodeling

    Best Eco Friendly Home Renovation Materials for Remodeling

    Planning a home upgrade can feel overwhelmingly complicated once you start looking at materials. Choosing the best eco friendly home renovation materials helps you build a space that feels fresh, keeps your family healthy, and cuts down on long-term utility costs.

    Upgrading your living space sustainably means combining low environmental impact, durability, and non-toxic safety. These choices protect planet earth while making sure your house stands strong for generations.

    Key Takeaways

    • Healthier Living: Low-VOC products keep toxic chemical fumes out of your indoor air.
    • Lower Bills: Natural insulation reduces your monthly energy costs significantly over time.
    • Built to Last: Sustainable picks like bamboo outlast many cheap traditional building options.
    • Budget Friendly: Recycled glass and cork offer high-end style at approachable prices.
    • Resale Value: Modern home buyers gladly pay extra for green energy efficient upgrades.

    Upgrading Green is a Total Game Changer

    Making sustainable upgrades to your living space is the ultimate home improvement win.

    Why swap standard builder supplies for sustainable alternatives? Think of it as giving your home a massive power-up! You eliminate nasty toxic chemicals, slash monthly energy costs, and give old landfills the cold shoulder. The best eco friendly home renovation materials let you flex your personal interior style while creating a healthier, happier sanctuary. It is pure living room magic.

    High Performance Sustainable Flooring and Surfaces

    Choosing the right base for your living areas sets the foundation for your entire house layout and increasing the home value. Natural floor coverings give your spaces a warm aesthetic while standing up to heavy daily foot traffic. Modern processing techniques ensure these products handle spills, pets, and active family life with ease.

    Rapidly Renewable Bamboo Flooring

    Fast-growing bamboo provides a durable alternative to slow-growing traditional hardwoods. Bamboo grows back in just 3 to 5 years, making it a fast-renewing choice that is strong and hard like traditional wood. It resists surface scratches from pets and copes remarkably well with shifting indoor humidity levels.

    Cushioned and Quiet Cork Flooring

    Cushioned and Quiet Cork Flooring

    Soft underfoot, cork gives living rooms exceptional sound absorption and natural warmth. Cork flooring is harvested from tree bark without cutting down the tree itself. It is soft under your feet, reduces room noise significantly, and naturally resists mold and common household pests.

    Timeless Reclaimed Wood Accent Panels

    Repurposed timber brings unmatched historic character and rich texture into modern living spaces. Reclaimed wood is salvaged from old barns and historic buildings to save living trees. It adds unique rustic style when installed as floor planks, ceiling accents, or decorative wall beams.

    Durable Recycled Glass Countertops

    Modern resin binders mix post-consumer glass into incredibly tough kitchen work surfaces. Recycled glass countertops are made from crushed glass fragments mixed directly into a strong base. This creates a striking, highly durable kitchen surface that easily resists stains and cooking heat.

    Clean Finishes and Energy Saving Insulation

    Wall finishes and thermal barriers control your indoor environment and dictate air cleanliness. Selecting non-toxic sealants and natural insulation keeps your indoor spaces running efficiently year-round. These products stop drafty air leaks while preventing chemical vapors from circulating through your HVAC ducts.

    Clean Finishes and Energy Saving Insulation

    Fresh Air Zero-VOC Paints

    Modern non-toxic paints deliver rich wall coverage without releasing harsh off-gassing vapors. Zero-VOC paints are completely free of harmful chemical fumes known as volatile organic compounds. Using these formulas keeps your indoor air clean, safe, and smell-free during your remodel.

    Moisture Regulating Sheep’s Wool Insulation

    Natural wool fibers trap thermal energy naturally while managing excess airborne moisture. Sheep’s wool insulation is a natural, chemical-free material that traps indoor heat exceptionally well. It regulates humidity levels naturally inside wall cavities to prevent structural mold growth over time.

    Sound Absorbing Recycled Denim Insulation

    Repurposed cotton blue jeans create a dense thermal blanket that stops sound transmission cold. Recycled denim insulation is made from post-consumer cotton blue jeans, providing a safe alternative to fiberglass. It offers impressive acoustic dampening performance without itching your skin during installation.

    How to Install the Best Eco Friendly Home Renovation Materials

    Executing your green remodeling project smoothly requires a logical, organized step-by-step approach.

    How to Install the Best Eco Friendly Home Renovation Materials

    Start by assessing your current living spaces to spot drafty walls, worn floors, or off-gassing paints that need immediate replacement. Measure your square footage carefully to avoid ordering excess supplies that end up as construction waste.

    Research local building salvage yards or certified green suppliers to source your materials. Always check for independent eco-labels like FSC or GREENGUARD Gold to verify sustainability claims before buying.

    Prepare your subfloors and wall surfaces properly to guarantee a seamless installation. Hire licensed installation contractors who have direct experience handling specialty bio-composites, non-toxic adhesives, and natural insulation products.

    Inspect finished surfaces thoroughly after installation to verify tight seals and smooth alignment. Enjoy your updated, healthy living space knowing your choices protect both your family and the surrounding environment.

    Frequently Asked Questions

    1. What is the most environmentally friendly house material?

    Reclaimed wood and rammed earth stand out as top choices. Reclaimed wood requires zero new tree harvesting, while rammed earth relies on natural raw soil to build incredibly strong, low-carbon walls.

    2. What are some eco-friendly materials I can use for renovation?

    You can renovate using bamboo flooring, natural cork tiles, recycled glass countertops, sheep’s wool insulation, and zero-VOC paints. Reclaimed timber and recycled steel also provide fantastic structural choices.

    3. What is the most eco-friendly alternative to plastic?

    Bio-based composite decking made from rice hulls, hemp fibers, or cork offers incredible durability. These products replace synthetic plastics without shedding harmful microplastics into your surrounding yard soil.

    4. What are some non-toxic building materials for houses?

    Untreated solid timber, clay plaster, sheep’s wool, zero-VOC paint, and natural cork contain no harsh synthetic chemicals. They keep indoor air clean by eliminating formaldehyde and dangerous solvents.

    Welcome to Your Dream Green Home!

    Choosing the best eco friendly home renovation materials transforms your living space into a healthy, comfortable, and energy-efficient sanctuary. Sustainable materials save substantial money on monthly power bills while elevating overall home value. Pick your favorite green material today and start building the healthy, eco-conscious home you deserve!

  • Do You Need Permits for Renovation? Easy Homeowner Guide

    Do You Need Permits for Renovation? Easy Homeowner Guide

    Talking with residential contractors every single day reveals one big question homeowners always ask right away: do you need permits for renovation work, or can you dive straight into demolition day?

    Navigating city building departments might seem overwhelming at first, but taking a moment to understand residential building codes saves you huge financial headaches down the road. Local zoning laws exist to keep your home safe, preserve property value, and protect your family from hidden electrical or structural hazards.

    Whether you are dreaming of an open-concept kitchen overhaul or simply updating a drafty guest bathroom, knowing where your project falls on the legal permit spectrum keeps your remodeling plans running smoothly without unexpected municipal delays.

    Key Takeaways

    • Major structural changes, electrical panel upgrades, and plumbing relocations always require permits.
    • Surface updates like painting, new carpets, cabinet swaps, and fixture replacements do not need permits.
    • Unpermitted work can lead to municipal stop-work orders, steep fines, and major home resale delays.
    • Local building codes vary by municipality, so checking local town rules early is essential.
    • Working with licensed trade contractors ensures code compliance and smooth building inspection visits.

    Why Do You Need Permits for Renovation Anyway?

    Think of building permits as your home remodeling safety net and a handy seal of approval. Asking yourself do you need permits for renovation keeps your contractors honest, protects your family from unsafe electrical work, prevents structural collapse, and stops your local code inspector from turning your dream project into a sudden construction nightmare.

    Projects That Require Permits

    Determining whether your upcoming home improvement project requires official city approval usually comes down to structural integrity, safety risks, and major utility line modifications.

    Structural Modifications and Load-Bearing Changes

    Taking down interior walls to create a modern open floor plan alters how weight transfers through your home’s framing. Removing load-bearing partitions, changing foundation footings, modifying rooflines, and constructing new outdoor living spaces almost always require structural building permits from your local city hall.

    Electrical, Plumbing, and Gas Lines

    Electrical, Plumbing, and Gas Lines

    Upgrading electrical panels, running brand-new wiring circuits, or moving main water supply lines requires trade-specific permits. Local building inspectors must verify that high-risk mechanical work complies with current national building codes and health standards to prevent fires or water contamination.

    Exterior Structural Alterations

    Installing new windows that require cutting larger wall frames, building raised decks higher than thirty inches, or replacing entire roofing structures triggers municipal reviews. These regulations protect neighboring properties and ensure outdoor additions meet set-back requirements.

    Projects That Do Not Require Permits

    Many rewarding home improvement tasks do not require dealing with local building departments, submitting complex floor plans, or paying administrative filing fees.

    Projects That Do Not Require Permits

    Interior Finishes and Surface Updates

    Refreshing your living room walls with colorful paint, putting up wallpaper, or installing new plush carpet involves zero structural alterations. You can completely transform the visual energy of your living spaces on your own schedule without filing any paperwork with local officials.

    Direct Plumbing and Light Fixture Swaps

    Swapping an existing kitchen faucet, installing a stylish dining chandelier, or replacing outdated light switches in their original boxes requires no permission. Direct replacements using current utility locations are safe DIY updates that bypass official permit reviews.

    Kitchen and Bathroom Cabinet Replacement

    Replacing old kitchen cabinets or updating a bathroom vanity is exempt from permits as long as your layout stays identical. If you keep your original sink lines and gas ranges right where they belong, cabinet upgrades flow smoothly without municipal oversight.

    How to Get Renovation Permits Step by Step

    Applying for building permits does not need to feel like an endless administrative maze when you follow a clear plan for your project.

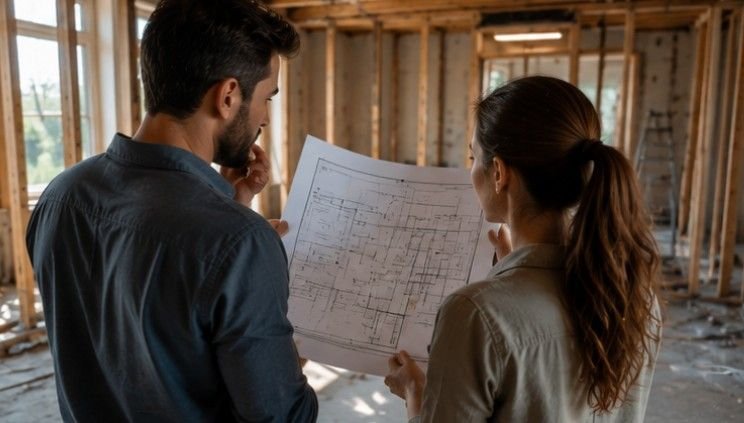
    First, check your local town website to review residential permit requirements and download application checklists. Draw scaled floor plans showing current layouts alongside your proposed renovation changes. 

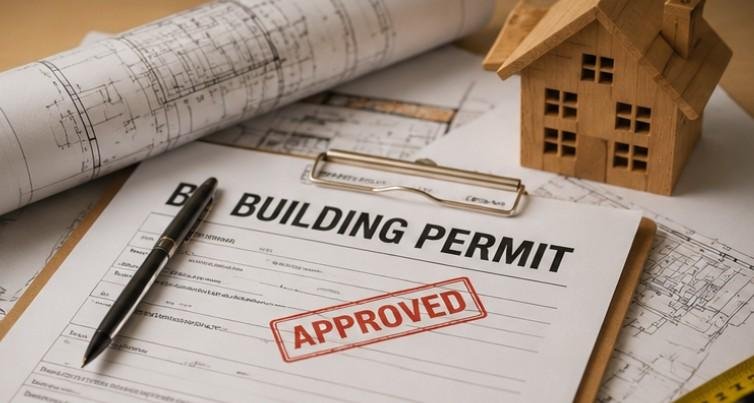
    Submit your application online or in person alongside required plan review processing fees. Display your approved permit card visibly on your front window before contractors start demolition work. Schedule required rough-in and final building inspections as construction milestones finish up.

    What Happens When You Skip Needed Permits?

    Attempting to complete structural or utility alterations without proper permits creates serious legal and financial liabilities for homeowners.

    What Happens When You Skip Needed Permits

    Expensive Fines and Stop-Work Orders

    If municipal code enforcement officers spot unpermitted construction work, they will issue an immediate stop-work order on your property. Municipalities often charge double or triple permit fees as penalty fines before allowing any construction activity to resume.

    Complications During Home Resale

    Potential home buyers and mortgage lenders require disclosures regarding past residential renovations during home inspections. Unpermitted room additions or illegal electrical panel updates can derail real estate sales, force heavy price concessions, or require costly retroactive permitting. Additionally, it affects the home value of the property.

    Insurance Claim Denials

    If unpermitted electrical work triggers a house fire or non-code plumbing fails and floods your basement, insurance carriers may deny coverage. Insurance policies explicitly exclude damages stemming from non-compliant building modifications or unlicensed work.

    Frequently Asked Questions

    1. Do you need permits for renovation projects in most cities?

    Yes, you generally need permits for renovations involving structural framing changes, moving plumbing lines, electrical rewiring, or expanding your footprint. Cosmetic work like painting or new flooring never requires municipal permits.

    2. What happens if you add a room without a permit?

    Building an unpermitted room addition risks severe municipal fines, stop-work orders, and potential forced demolition. Unpermitted square footage cannot be counted in official real estate listings, heavily lowering property appraisal values during future sales.

    3. Do I need a permit to remodel my bathroom in Virginia?

    Yes, Virginia building codes require permits if your bathroom remodel involves moving plumbing lines, adding electrical outlets, or altering structural framing. Purely cosmetic updates like swapping vanities or repainting walls do not require permits.

    4. Do I need a permit to remodel my bathroom in San Jose?

    San Jose requires permits for bathroom remodels that shift plumbing fixtures, upgrade electrical circuits, or move walls. Simple cosmetic direct swaps for light fixtures, tile, or paint using existing locations are completely exempt from permits.

    5. What can a homeowner do without a permit in Georgia?

    Georgia homeowners can complete cosmetic repairs like interior painting, installing flooring, replacing kitchen cabinets, and swapping existing plumbing fixtures without permits. Any work altering electrical wiring, gas lines, or structural walls requires permits.

    Wrap Up Your Remodel with Total Confidence

    Now that you know the answer to do you need permits for renovation projects, you can tackle your home updates with complete confidence. Knowing the line between simple cosmetic finishes and major structural or utility overhauls keeps your property safe, financially sound, and fully compliant with local codes. Protect your home investment by checking municipal guidelines early, securing permits upfront, and building your dream space the right way.

  • Pro Survival Secrets: How to Live in House During Renovation

    Pro Survival Secrets: How to Live in House During Renovation

    Navigating a major home remodel while sleeping under the same roof often feels like indoor camping surrounded by drywall dust and loud power tools. Learning how to live in house during renovation projects takes more than tolerance; it requires a realistic blueprint to protect your daily routines, health, and peace of mind while work is underway. 

    Remodeling brings noise, foot traffic, and unexpected daily surprises that disrupt even the most organized households. Staying on-site saves thousands of dollars in temporary rental fees and lets you monitor progress up close. With proactive planning, clear boundaries, and smart temporary setups, staying put during construction can be surprisingly manageable.

    Key Takeaways

    • Create a dedicated dust-free safe zone with sealed doorways and independent air filtration.
    • Set up a temporary kitchen with plug-in appliances before demolition starts.
    • Establish clear contractor ground rules regarding working hours, parking, and daily cleanups.
    • Balance budget savings with mental well-being when deciding to stay on-site.
    • Plan routines around scheduled utility shutoffs to avoid daily household disruptions.

    Creating Safe and Clean Zones

    Preparing your living spaces before the crew arrives prevents damage to personal property and establishes clear physical boundaries.

    Seal the Work Area

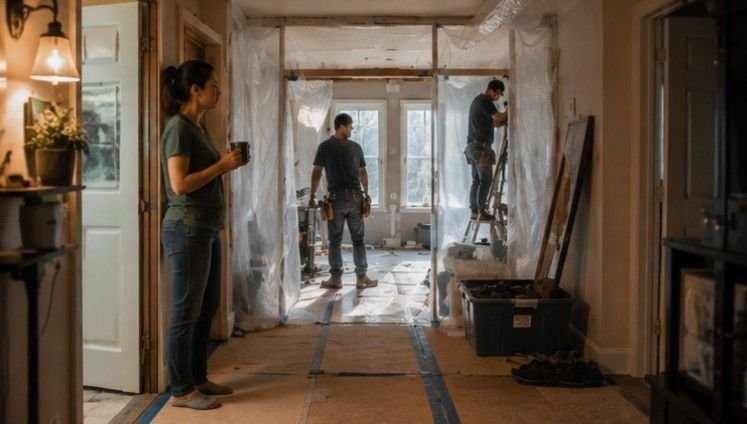
    Fine drywall and saw dust penetrate every unsealed corner of a home if left unmanaged. Professional contractors use plastic zip-wall barriers and heavy-duty tape to block construction zones from your living space. Homeowners should also seal return air vents in active work zones to prevent dust from recirculating through the central HVAC system.

    Run Air Purifiers

    Having clean indoor air provides essential health protection and comfort after a long, dusty workday. Keep HEPA air filters running constantly in occupied rooms to trap fine drywall and wood dust before it settles. Stock this clean space with extra filters, comfortable seating, and noise-canceling headphones for total relaxation.

    Protect Floors

    Heavy foot traffic and flying debris quickly ruin hardwood, carpet, and tile pathways. Cover non-renovated pathways with protective surface boards like Ram Board to control dirt tracking throughout the property. Secure the edges with painter tape so nobody trips when walking past active construction areas.

    Managing Daily Essentials

    Maintaining basic daily functions like eating and bathing requires clever temporary workarounds when primary spaces are gutted as per the decided order to remodel the house.

    Set Up a Makeshift Kitchen

    Set Up a Makeshift Kitchen

    Losing access to a primary kitchen presents one of the biggest daily challenges during a remodel. Move a fridge, microwave, and hot plate or air fryer into a separate room away from the dust. Setting up a functional kitchenette in a dining room, garage, or hallway keeps meal preparation simple and affordable.

    Use Disposable Items

    Washing cooking utensils without a deep kitchen sink creates unnecessary daily frustration and messy plumbing backups. Switch to paper plates and plastic cutlery to make clean-up manageable when you lack a functional sink. Collect trash daily in heavy bags to keep your temporary eating zone fresh and pest-free.

    Plan Bathroom Priorities

    Sharing one functional bathroom during a major overhaul demands strict scheduling and organization across the household. Ensure at least one working bathroom is untouched, or schedule your project so it remains operational throughout demolition. Create morning shower schedules so family members do not compete for access before work or school.

    Contractor Communication and Safety Protocols

    Clear ground rules prevent misunderstandings and maintain household safety throughout the construction timeline.

    Setting Clear Operational Ground Rules

    Setting expectations on day one ensures respect for your living space and personal time. Establish designated parking areas, specified crew restrooms, and allowed entry doors before work begins. Agree on daily work hours, typically 8:00 AM to 5:00 PM, and require a daily job site sweep before the crew leaves.

    Protecting Kids and Pets from Hazards

    Protecting Kids and Pets from Hazards

    Active job sites present real physical dangers to curious children and domestic pets. Install sturdy baby gates or temporary lockable doors to physically block access to open walls, exposed wiring, and subfloors. Keep pets secure in designated rooms or consider daytime boarding during heavy demolition phases.

    Timeline-Based Adaptation Tips

    Organizing your daily schedule around key construction phases keeps stress manageable and expectations realistic.

    Pre-Demolition Week Preparation

    Preparation work completed prior to demolition sets the tone for a smoother project. Pack away all breakable items, artwork, and non-essential belongings into sealed storage bins. Label every container clearly and confirm water, gas, and electrical shutoff schedules with your project manager.

    Active Construction Phase Management

    Adapting to changing daily conditions helps maintain household balance while heavy work occurs. Prepare simple meals using your temporary kitchen setup or budget for takeout options during intense work weeks. Plan outdoor activities or work-from-home shifts away from the house during heavy pounding or tile-cutting hours.

    Budgeting: Staying On-Site vs. Moving Out

    Evaluating financial tradeoffs helps determine whether staying on-site makes sense for your project scale.

    Budgeting Staying On-Site vs. Moving Out

    Cost Breakdown Analysis

    Living at home during construction saves direct rental expenses but introduces hidden secondary costs. Staying on-site eliminates short-term rental costs that often range from $2,500 to $6,000 per month depending on location. However, factors like frequent takeout meals and extra storage bin rentals offset some of those savings.

    Decision-Making Framework

    Certain project conditions make staying on-site impractical or unsafe. Consider short-term relocation if your project requires complete roof removal, total plumbing line shutoffs lasting weeks, or major asbestos abatement. Households with infants or individuals with severe respiratory conditions should also prioritize temporary housing.

    Frequently Asked Questions

    1. Can I live in my house while it’s being renovated?

    Yes, learning how to live in house during renovation makes staying on-site completely possible. You can live in your house during cosmetic updates or single-room remodels as long as you maintain one functional bathroom, a temporary kitchen setup, and a sealed, dust-free bedroom zone.

    2. What is the 30% rule for renovations?

    The 30% rule suggests allocating 15% to 30% of your total renovation budget for unexpected costs, delays, or structural surprises that arise once walls and subfloors are opened during construction. This buffer keeps your project moving smoothly without financial strain.

    3. What are the most common renovation regrets?

    Common renovation regrets include failing to establish a realistic contingency budget, rushing design decisions, hiring contractors based solely on the lowest quote, and underestimating the daily disruption of living on-site throughout the active construction timeline.

    4. Where do I live while my house is being renovated?

    If living on-site isn’t feasible due to utility shutoffs or hazardous dust, homeowners typically stay in short-term furnished rentals, Extended Stay hotels, or with family members. RV rentals parked on the driveway are another popular option.

    Surviving Construction with Your Sanity Intact!

    Mastering how to live in house during renovation projects comes down to careful preparation, clear communication, and ongoing personal flexibility. By setting up a functional temporary kitchen, enforcing contractor ground rules, protecting a dust-free sanctuary, and managing air filtration, you can navigate construction delays smoothly. Focus on the final transformation, protect your daily peace of mind, and enjoy watching your newly remodeled home come to life!

  • How to Budget for Home Renovation: Simple Hacks That Work

    How to Budget for Home Renovation: Simple Hacks That Work

    Planning a dream remodel feels fantastic until real construction costs hit your bank account. Staring at contractor quotes while trying to protect your hard-earned savings can make anyone feel overwhelmed. Learning how to budget for home renovation properly keeps your wallet safe while turning your living space into a custom sanctuary.

    Why bother learning how to budget for home renovation before swinging a sledgehammer? Spontaneous shopping runs for fancy tile or high-end fixtures will drain your savings faster than a leaking pipe! Planning your dollars early keeps your dream project fun and prevents nasty financial surprises halfway through.

    Key Takeaways

    • Calculate a firm spending ceiling based on your total property value.
    • Reserve at least 15% of your cash specifically for hidden surprise costs.
    • Compare line-item bids from three different licensed local contractors.
    • Separate non-negotiable structural repairs from cosmetic finish upgrades.
    • Track every fixture purchase and material receipt using digital software.

    Core Expenses to Include in Your Remodel Plan

    Every solid financial plan requires identifying mandatory line-item costs before construction work actually begins.

    Materials and Supplies Essentials

    Raw materials form the foundation of your initial material costs breakdown. You must factor in major surface materials like hardwood flooring, ceramic tiles, and interior paint along with subtle construction components. Grout, specialized adhesives, fasteners, and rental tools add up quickly during active work phases.

    Professional Labor Costs

    Skilled trade expertise usually claims the largest portion of any home improvement allocation. Hiring certified electricians, master plumbers, and general contractors ensures your home meets local building codes safely. Gathering itemized labor rates protects your overall numbers from unexpected cost overruns during structural builds.

    Permits and City Fees

    Permits and City Fees

    Municipal paperwork often catches homeowners off guard during initial project planning. Local building permits and safety authorization fees are legally required by your city before tearing down walls. Reaching out to your local municipality guarantees these regulatory expenses are accounted for in advance.

    Emergency Contingency Fund

    Unseen structural or wiring issues routinely hide behind drywalls and aging floors. Setting aside an extra 10% to 15% specifically for a contingency fund cushions your wallet against unforeseen repairs. This dedicated cash reserve ensures your project never stalls when unexpected issues pop up.

    Steps to Build Your Budget for Success

    Following a structured preparation routine keeps your financial framework organized and completely stress-free from start to finish.

    Steps to Build Your Budget for Success

    Define Your Project Scope

    Deciding between a light cosmetic update and a full room gut job sets your initial path. Outline every specific task to prevent scope creep from quietly inflating your overall spending limits. Clarifying your exact boundaries early guarantees your funds cover mandatory structural needs before luxury finish selections.

    Get Multiple Contractor Bids

    Gathering detailed quotes from at least three licensed general contractors gives you real market clarity. Avoid vague estimates and request line-item breakdowns that separate material expenses from labor costs. Comparing quotes helps you spot inflated subcontractor markup and negotiate fair, competitive pricing.

    Shop Early for Materials

    Procuring fixtures, lighting, and tiles well ahead of time saves money and avoids costly shipping delays. Buying early locks in seasonal discounts while eliminating expensive rush-ordering penalties from manufacturers. Having your supplies delivered on time keeps contractor schedules running smoothly without paying idle crew fees.

    Prioritize Renovations by Return on Investment

    Not every upgrade delivers the same long-term value. Focus your budget on improvements that enhance functionality and boost resale appeal, such as kitchens, bathrooms, or energy-efficient upgrades. Postponing purely decorative additions helps you stay within budget while maximizing the financial benefits of your renovation investment.

    Smart Cost-Saving Strategies for Homeowners

    Executing strategic material and scheduling choices saves thousands of dollars without compromising on final build quality.

    Smart Cost-Saving Strategies for Homeowners

    Mix High-End Details with Budget Base Materials

    Pairing luxury hero elements with affordable background finishes creates a custom aesthetic very economically. Invest in statement kitchen faucets or quartz counters while selecting basic subway tiles for backsplashes. High-impact focal points draw positive attention while cost-effective background elements keep your overall spending balanced.

    Preserve Existing Plumbing Footprints

    Relocating sink drains, gas pipes, or toilet stacks instantly inflates labor charges by substantial amounts. Working within your home’s original floor plan layout preserves core plumbing and electrical infrastructure. Refreshing cabinets and fixtures over existing footprints yields fresh aesthetic results at a fraction of the cost.

    Perform Simple Teardown Tasks Yourself

    Handling basic prep tasks personally saves expensive trade labor hours during early project phases. Remove old trim work, unscrew cabinet doors, or pull up worn carpeting before trade crews arrive. Leave structural framing, main electrical runs, and complex plumbing to professionals (are renovation tasks you should not DIY) to protect your home’s safety.

    Frequently Asked Questions

    1. How to budget for home renovation easily?

    Calculating total costs, establishing a 15% contingency reserve, and ranking projects by necessity forms a solid foundation. Outline your exact scope, gather three contractor bids, and track daily fixture purchases to stay on target.

    2. What is the 30% rule for renovations?

    The 30% rule suggests capping total home improvement expenditures at 30% of your property’s overall market value. This guideline prevents over-capitalizing on your home, keeping it competitive and financially viable within your immediate neighborhood market.

    3. What is a realistic budget for home renovation?

    A realistic budget ranges between $20,000 and $75,000 for mid-sized residential projects. Overall costs depend on home size, regional labor rates, structural scope changes, and material choices.

    4. Is $100,000 enough to renovate a home?

    Yes, $100,000 easily covers a complete mid-range makeover for an average-sized residence. It comfortably funds major kitchen and bathroom overhauls along with updated interior finishes, provided major layout walls remain intact.

    5. Is $50,000 enough to renovate a house?

    Yes, $50,000 works extremely well for focused multi-room updates or cosmetic whole-house refreshers. It typically covers a complete kitchen remodel alongside one bathroom update if you carefully manage finish selections.

    Nail Your Remodel Spending Like a Absolute Pro!

    Mastering how to budget for home renovation transforms overwhelming home improvement dreams into organized, stress-free realities. By outlining your scope, securing competitive bids, and keeping a strong contingency fund, you protect your bank account throughout construction. Stick to your prioritized financial plan, track every dollar, and enjoy watching your home evolve without any monetary stress.

  • Don’t Pay Yet! How to Inspect Home After Renovation First

    Don’t Pay Yet! How to Inspect Home After Renovation First

    Stepping into your newly remodeled living room feels like entering a dream space you designed yourself. Learning how to inspect home after renovation work finishes ensures that your vision matches the real-world build quality before you make your final contractor payment.

    Key Takeaways

    • Bring essential tool kit items like circuit testers and painter tape for tagging.
    • Inspect all wall finishes, tile trim, and cabinet hardware for alignment.
    • Run every plumbing fixture and electrical outlet under maximum load.
    • Verify final local city permits and contract scope paperwork thoroughly.
    • Retain ten percent of final payment until punch list items get resolved.

    Inspecting Home After Renovation Saved My Sanity

    Playing detective in your own living room might feel silly at first, but it is actually the ultimate victory lap! Uncovering a hidden pipe leak or an unpowered outlet today stops a massive headache tomorrow, keeping your wallet happy and your excitement intact.

    Getting Prepared for Your Walkthrough

    Equipping yourself with simple auditing tools makes spotting hidden installation flaws effortless during your walkthrough. Grab a plug-in outlet analyzer, a bright flashlight, a laser measure, and blue painter tape to mark spots directly on surfaces.

    Setting Expectations With Your General Contractor

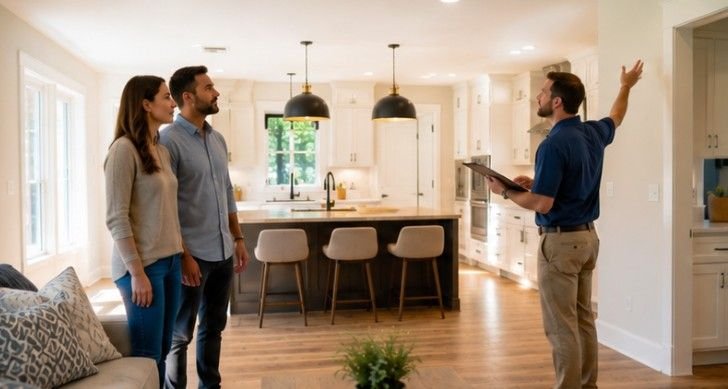
    Scheduling a dedicated two-hour inspection block during peak daylight hours keeps communication clear and relaxed. Walk through every room together so both parties agree on what qualifies as completed work versus an item needing extra attention.

    Examining Finishes and Surfaces

    Evaluating decorative work requires a keen eye and a systematic approach through every newly built space.

    Examining Finishes and Surfaces

    Walls and Ceilings

    Inspecting drywall installations requires viewing surfaces under both direct natural sunlight and artificial overhead lights. Look closely for uneven seam bumps, visible nail pops, minor cracks, or paint drips near renovated zones to ensure seamless coverage.

    Floors and Trim

    Walking across new flooring in socks helps you detect loose floorboards or hollow sounds beneath fresh floor tiles. Check baseboard connections thoroughly to ensure trim pieces sit completely flush against walls without wide gaps or uneven seams.

    Cabinets and Doors

    Operating cabinet doors and drawers repeatedly reveals hidden alignment errors caused by hasty hardware installation. Open and close every interior door, pantry drawer, and exterior entry to confirm they latch smoothly without sticking or rubbing against frames.

    Testing Mechanical and Electrical Systems

    Verifying hidden utility infrastructure requires active stress-testing rather than simple visual approval.

    Testing Mechanical and Electrical Systems

    Plumbing

    Running every water source simultaneously reveals underlying water pressure drops or slow drain lines in fresh pipes. Turn on all new faucets, flush toilets repeatedly, and check underneath sink cabinets with dry paper towels to spot subtle leaks.

    Electrical

    Testing newly wired circuits demands checking every single wall outlet rather than assuming one working plug covers the room. Plug a small circuit tester into every receptacle, switch on all light dimmers, and test GFCI reset buttons near sinks.

    HVAC

    Testing your climate control system protects your home from construction dust lingering inside fresh air ducts. Switch on the heating and air conditioning units, verifying that vents blow air properly throughout all newly renovated living spaces.

    Reviewing Paperwork and Permits

    Protecting your legal rights and financial investment depends on thorough post-construction record keeping.

    Contract Details

    Comparing your completed rooms against original project specifications ensures you received every paid upgrade. Review your signed contract line by line to confirm that promised light fixtures, appliance models, and material grades were actually installed.

    City Sign-Offs

    Verifying municipal compliance protects your property value and prevents severe issues during future home sales. Confirm that your contractor closed out all local building permits with official final city inspection stamps and proper documentation.

    Inspect Safety Features and Overall Functionality

    Inspect Safety Features and Overall Functionality

    Beyond cosmetic finishes and mechanical systems, take time to verify that every safety feature functions exactly as intended. Test smoke detectors and carbon monoxide alarms to ensure they respond correctly and have fresh batteries if required. Confirm that handrails, stair treads, and guardrails feel secure without movement or loose fasteners. Check that windows open, close, and lock smoothly, especially emergency escape windows in bedrooms.

    Walk through each renovated room at different times of the day to observe lighting levels and identify shadows that may reveal uneven paint, drywall imperfections, or flooring defects. Open every window and exterior door to confirm proper weather sealing and smooth operation. Listen for unusual squeaks, rattles, or airflow around frames that could indicate installation issues.

    Finally, verify that all newly installed appliances operate correctly according to the manufacturer’s instructions. Run dishwashers through a short cycle, test range hoods, inspect built-in microwaves, and ensure refrigerators, ovens, and ventilation systems work without unusual noises or warning lights. Completing these functional checks helps confirm that your renovation is not only visually appealing but also safe, efficient, and ready for everyday use.

    Inspect Home After Renovation Like a Seasoned Professional

    Applying systematic inspection steps lets you catch cosmetic flaws and utility glitches with total confidence. Start by gathering your tools, walking through each room in a logical sequence, and tagging defects with painter tape as you notice them.

    Next, run all water fixtures, test every electrical plug, and cycle your HVAC unit to confirm mechanical safety. Finally, cross-reference your original contract terms, secure official municipal permit closeouts, and hold back final retainage funds until every punch list defect gets repaired.

    For official home construction standards, visit the National Association of Home Builders or review homeowner consumer advice at the Federal Trade Commission website.

    Frequently Asked Questions

    1. What is the biggest red flag in a home inspection?

    Unaddressed water intrusion or fresh plumbing leaks represent the absolute biggest red flag during any walkthrough. Water damages structural framing, triggers dangerous mold growth, and signals immediate pipe installation failure that requires instant professional repair.

    2. What to check after renovation?

    Focus your post-renovation inspection on three primary areas: surface finishes, utility systems, and legal permits. Check paint finish quality, test electrical outlets, stress-test plumbing, and verify that city building permits have official closeout sign-offs.

    3. What is not checked during a home inspection?

    Standard inspections do not evaluate internal pipe walls, low-voltage alarm wiring, hidden drain lines, or personal cosmetic choices. They focus strictly on functional operations, structural integrity, and local residential building code standards.

    4. Should I get my home appraised after renovation?

    Yes, ordering a new property appraisal after major remodeling confirms your increased home equity. An updated appraisal helps adjust your homeowner insurance policy coverage limits and supports future refinancing efforts seamlessly.

    Victory Is Yours Now Sit Back and Relax!

    Mastering how to inspect home after renovation milestones gives you total peace of mind regarding your property investment. Once your contractor resolves the final punch list items and you release the remaining payment, you can relax completely and enjoy your beautiful, newly upgraded living space for years to come.